Brown Butter Cookie Bars

*This post may contain affiliate links. Please see my disclosure for more details!*
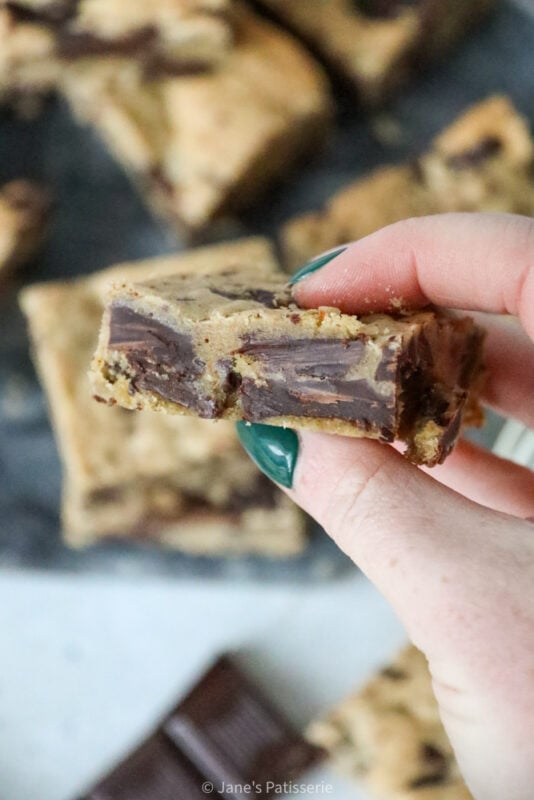
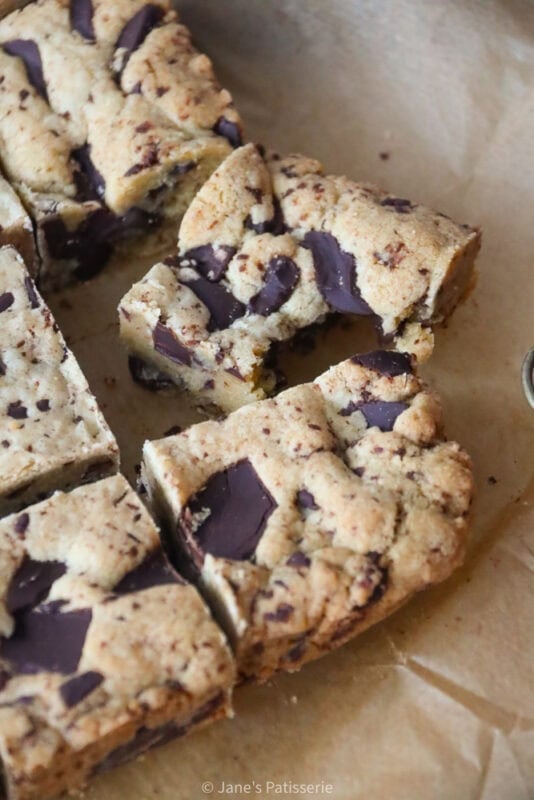
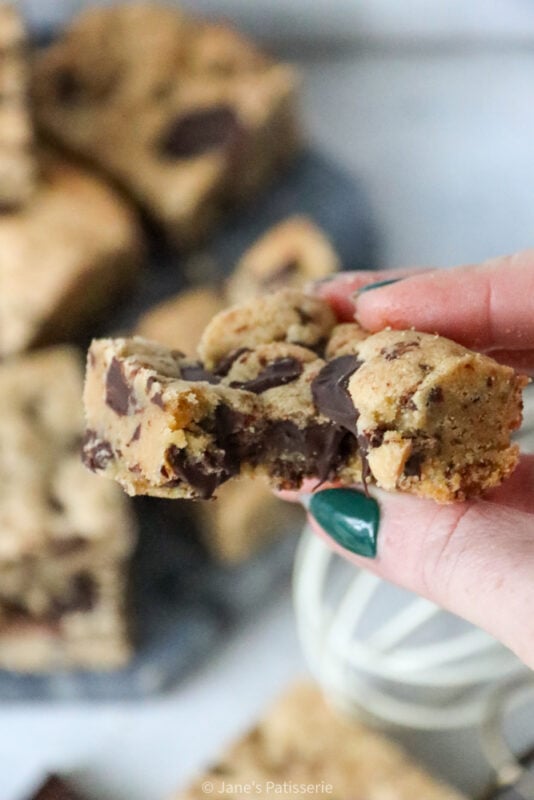
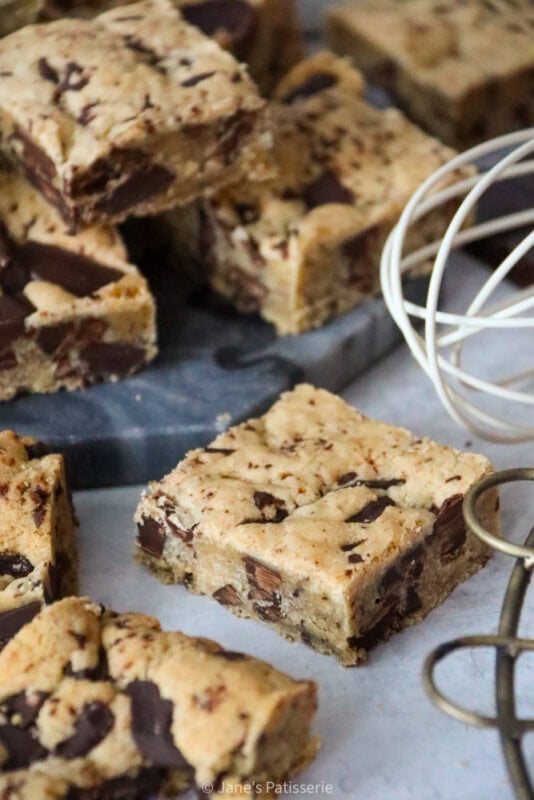
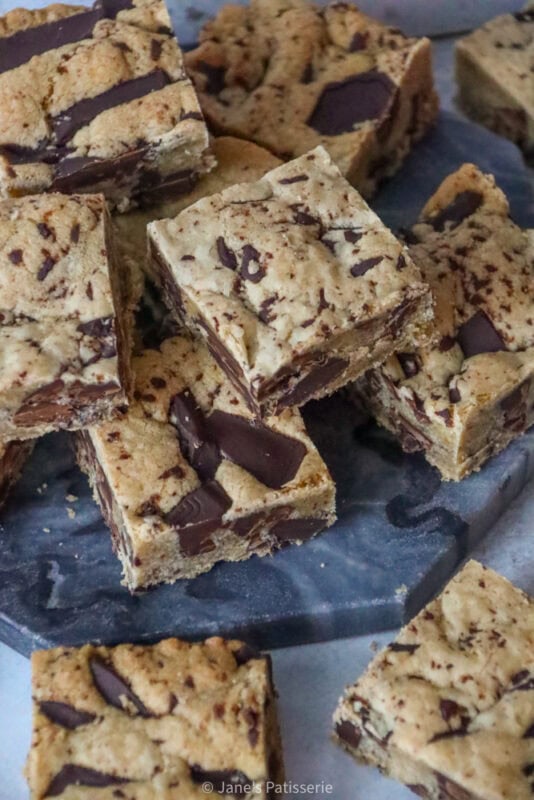
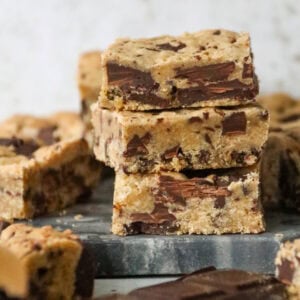
Soft and chewy brown butter cookie bars, stuffed with chocolate chunks throughout, they’re gooey and heavenly in every bite.
What is brown butter?
Brown butter (often called beurre noisette) is ordinary butter that’s been gently heated until it turns a warm golden-brown and smells rich and nutty. The flavour is much richer than regular melted butter: less creamy, more savoury and nutty, with a slight sweetness. The texture stays liquid while hot, but it will firm up again as it cools.
As the butter melts, it first separates into melted fat and milk solids. If you keep it over a low to medium heat, the water cooks off and the milk solids sink to the bottom and slowly toast. When they turn light brown, the butter develops a deep aroma similar to toasted hazelnuts, toffee, and caramel.
In cooking, brown butter is used to add depth rather than just richness. It’s common in cooking for the depth of flavour, but I adore using it in baking for biscuits, cakes, and blondies etc.

How to brown butter
You brown butter by adding the butter you are using to a medium or so sized pan, and melting on a low heat. Once the butter has simply melted, you let it continue to cook over the heat.
It will start to bubble quite a lot as the water content of the butter cooks off, so make sure to keep an eye on it, and swirl the pan or stir the mixture slightly to make sure that the mixture is cooking evenly.
After a few minutes of cooking, the milk solids of the butter will sink to the bottom of the pan, turning golden brown. This is the stage in which it should become nutty and caramel like in colour – as soon as it reaches this stage, take it off the heat.
If its your first time making brown butter, it’s best to slightly under-do it compared to over, because it can burn quickly once the solids brown, and taste quite bitter.
The cookie dough
The base of the cookie dough is really the brown butter, and although it will read as having more butter than the standard cookie bar I have made, it’s because some of the weight of the butter disappears during the process of browning the butter.
As for the rest, it’s a typical cookie dough, with a delicious mix of brown sugar for the best flavour, and also some chunky bits of chocolate of course.
- Butter – browned butter, as above
- Sugar – I used light brown soft sugar as it marries so well with the buttery flavour, but any sugar really works – a mix of granulated and light brown is lovely.
- Egg – one egg is best – I use medium in general, but one large is fine
- Vanilla extract – A dash of vanilla adds depth of flavour, but it’s completely optional.
- Flour – Plain flour is used for better control over rise and spread, since it contains no raising agents. I also add in some cornflour for texture, but you can replace it with 25g more plain flour
- Raising Agent – A dash of bicarbonate of soda is important for the texture of the cookies. These are regular sized, so you don’t need baking powder
- Salt – A pinch of sea salt brings balance and enhances the chocolate and sweetness beautifully but again, this is optional
The chocolate of choice
There are so many varying types of chocolate these days, that it seems like endless choice. I always to want to encourage people to use chocolate that they actually like, and as it’s the chocolate chips or chunks that you are folding through the cookie dough here, you can do what you want. For example, I love all types of chocolate, but I LOVE adding dark chocolate to anything with browned butter in.
Whenever you use chocolate chunks or chips like this, you can buy ready made chocolate chips in the small bags, bulk buy like I do, or you can just use a bar of chocolate that you chop up. Usually, buying bars of chocolate and chopping up is far cheaper, so generally that is what I do these days.
I buy the supermarket own chocolate bars and chop them up with a knife to a smaller size, or just break up the pieces slightly so there are slightly bigger chunks too. Like I have said, I used dark chocolate, but you can use milk, white, or a mix of them all if you prefer.

Making the cookie bars
Once you have made the brown butter, you need to let it cool back to room temperature. You don’t want to use it when it’s fresh and hot, so pour it into a bowl and let it cool slightly. It might solidify ever so slightly, but that’s okay – don’t worry.
Once it’s cooled, add the browned butter to a bowl and add the sugar. Mix together until combined, and then add the egg and vanilla extract – if you want any other added flavours, now is a good time to add them (almond extract would be delicious, for example).
Add the dried ingredients (flour, cornflour, bicarb, salt) and mix to a cookie dough. You can either do all of this in a large bowl with a spoon, or in anything up to a stand mixer – so simple to do.
Fold through the chocolate chips of choice, and then press into the base of a lined 9” square baking tin. I always use a 9” square tin for a traybake like this because it makes the perfect sized bar and depth of bar too.
Tips & Tricks
- It’s best to use a block unsalted butter when making browned butter – using a margarine won’t work in the same way as it’s not butter.
- If you want to add cocoa powder to make them chocolate flavoured, you can remove the cornflour, and 25g of plain flour, and add in 35g cocoa powder total – generally you need slightly less dry ingredients for a chocolate base as cocoa is more drying.
- These will last 5-7+ days at room temperature, or in the fridge
- These will freeze for 3+ months
- I use this 9” square tin in this recipe
Brown butter cookie bars
Ingredients
Butter
- 175 g unsalted butter (not spread/margarine)
Cookie Dough
- 175 g light brown soft sugar
- 1 medium egg
- 1 tsp vanilla extract
- 275 g plain flour
- 1 tsp bicarbonate of soda
- 0.5 tsp sea salt
- 1 tbsp cornflour
- 100-300 g chocolate chips/chunks
Instructions
- Add the butter to a medium sized pan
- Heat the butter for a few minutes to melt down until smooth
- Once melted, keep cooking the butter in the pan for a further few minutes, for the milk solids to start to brown. You are looking for a deeper caramel colour
- Make sure to swirl the pan and stir slightly to stop anything from burning
- Once browned, pour the brown butter into a new bowl to cool
- Preheat the oven to 180ºc/160ºc fan and line a 9” square tin with parchment paper
- Add the browned butter to a mixing bowl, with the sugar, and beat together until combined
- Add the egg, and vanilla and mix again
- Add the flour, cornflour, bicarb and salt and combine
- Add the chocolate and mix through (you can use as much or as little as you want between 100-300g - I tend to use all 300g as I like it chocolatey)
- Press into the base of the tin and bake for 20-22 minutes
- Leave to cool for at least 30 minutes in the tin and enjoy
Notes
- It’s best to use a block unsalted butter when making browned butter - using a margarine won’t work in the same way as it’s not butter.
- If you want to add cocoa powder to make them chocolate flavoured, you can remove the cornflour, and 25g of plain flour, and add in 35g cocoa powder total - generally you need slightly less dry ingredients for a chocolate base as cocoa is more drying.
- These will last 5-7+ days at room temperature, or in the fridge
- These will freeze for 3+ months
- I use this 9” square tin in this recipe
Can these be made into normal cookies instead of bars?
These are amazing! The brown butter really elevates the cookies to another level, with a nutty caramel like flavour. New favorite!
Such a quick easy recipe, which was just what I was looking for to bake my children something nice for when they got home. I did 100g each of white/dark/milk chocolate chips and it was perfect.
Amazing recipe ! My new favourite. I used 150g dark & 150g Milk Chocolate. 🙂 x
Absolutely delicious! I used 200g of dark chocolate cut up and 100g of milk chocolate chips, chilled in the fridge for 30 mins then served and it was amazing, still gooey but solid enough to cut. Thank you 🙂
I normally make the nyc cookies with vegan spread and oat milk and an egg substitute. Do you think if I used flora block butter, it will work in the same way as ordinary block butter to get the same result? Thank you
Could I use mini m&ms instead of chocolate chips?