Making a Sourdough Starter

*This post may contain affiliate links. Please see my disclosure for more details!*
How to make a sourdough starter: a ten day guide on how to make a sourdough starter from scratch
Originally this series of days was just going to be a social media video series, but so many of you have asked for a written version – so here it is. Each day has a youtube shorts video linked so you can have a visual if you need it.
Making a sourdough starter from scratch can feel a little intimidating at first, but it’s actually a slow, simple, and very rewarding process. Over the course of 10 days, I documented exactly what happened to my starter, what I fed it, and what changes to expect along the way.
This blog post pulls everything together into one place so you can follow along day by day and grow your own bubbly sourdough starter at home… I promise you it’s worth it for all of the bakes you can make with sourdough and discard.
Making a starter
There are SO many different ways, methods and ideas on what you should and shouldn’t do when making a sourdough starter, or even baking sourdough. If you find something that works for you, that is totally fine – you go for it.
I kept things intentionally simple by using a 1:1:1 ratio throughout (equal parts starter, flour, and water by weight, apart from day one). Smaller quantities are ideal at the beginning because you’ll be discarding daily, and this keeps waste to a minimum.
There are notes/comments/etc on all of the videos I have done for this series so far – but also, feel free to leave any below.
Day One
Day one is all about creating the environment for fermentation to start. There’s no starter yet, it’s just just flour and water. (Watch my how-to video here for day one)
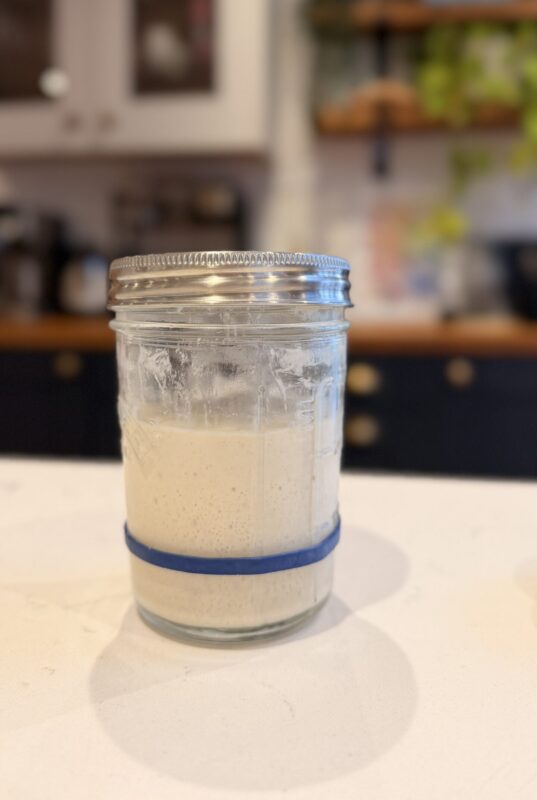
I mixed 20g strong white bread flour with 20g water until it formed a thick paste. This went into a clean jar with the lid placed loosely on top. You don’t want to seal it completely; the starter needs to breathe.
A helpful tip at this stage is weighing your empty jar before you begin. This makes discarding and feeding much easier later on. Once mixed, the jar is left at room temperature for 24 hours. Nothing dramatic will happen yet, and that’s completely normal.
I used a supermarket’s own strong white bread flour, with a protein percentage of 13% (the higher protein the better usually) and I used water that had been filtered (as I live in the south of the UK and the water is always ridden with limescale) that is at room temperature.
This is the starter set I was given over Christmas, and it’s a good place to start.
Day Two
On day two, you introduce feeding. Even if the starter looks exactly the same as yesterday, don’t panic. (Watch my how-to video here for day two)
Discard enough starter to leave 20g in the jar, then feed it with 20g strong white bread flour, and 20g water. Mix back into a thick paste, loosely cover, and leave at room temperature again. This is the rhythm you’ll repeat daily. At this stage, it’s all about consistency and trust in the process.
It’s useful to have weighed your jar on day one, so that you can easily do the maths of the starter. My jar weighed 318g, so I knew that I would have 20g of starter left in the jar if I weighed it and it had 338g in it. Top tip – throw the discarded stuff into the bin, you don’t want it to go down the drain.
Day Three
Day three can feel uneventful. My starter showed little to no activity, which is absolutely fine especially in a cold kitchen. Sourdough thrives on warmth, so this is when I moved mine to a warmer spot (I used my microwave, with a mug of boiling water inside). (Watch my how-to video here for day three)
The feed stayed the same: 20g starter, 20g flour, 20g water. After discarding and feeding, I left it in the microwave with the mug of boiling water. Slow and steady is very much the sourdough way.
Day Four
Finally, some excitement! On day four, small bubbles started to appear, and the smell shifted slightly. This is a great sign that something is happening. (Watch my how-to video here for day four)
I continued feeding at the same 1:1:1 ratio and returned the starter to a warm spot. If you’re not seeing any activity by this point, warmth is usually the key. You can also check your flour’s protein content, try filtered water, or experiment with a 1:2:2 ratio to give the starter more food. Even tiny bubbles are a win!
Day Five
By day five, some starters will be bubbling more, while others are still taking their time. Both are completely normal. Starters can take anywhere from 7 to 14 days to become fully active. I usually say it’s at least 10-14 days, but it can be quicker, especially in a warmer country or in warmer months (Watch my how-to video here for day five)
I stuck with my usual feeding routine and focused on consistency… feeding at the same time each day, keeping the jar loosely covered, and placing it somewhere warm. A reminder at this stage: always discard into the bin, not the sink, as starter can cause plumbing issues.
Day Six
Day six is often when things start to shift noticeably. More bubbles appear, the starter may rise slightly, and that tangy, yeasty smell begins to develop. (Watch my how-to video here for day six)
I fed as usual and reminded myself that every starter behaves differently. Some surge ahead, others crawl but both can become strong, healthy starters with time and care.
Day Seven
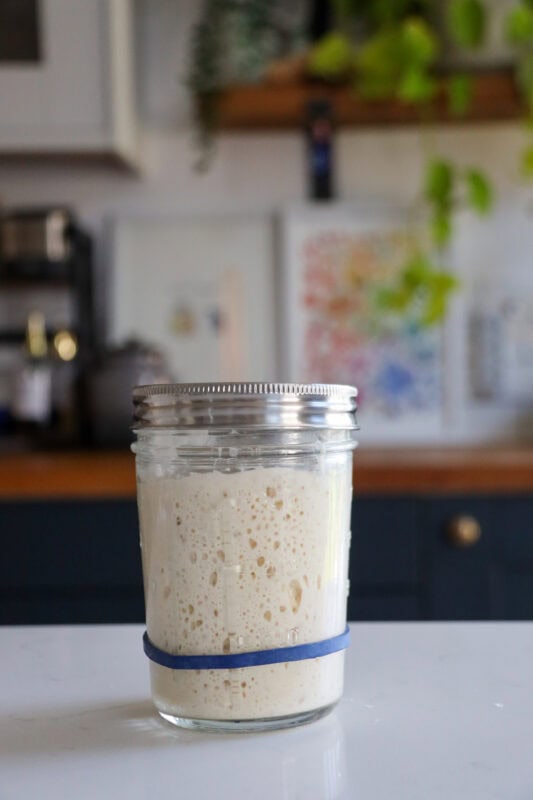
After a week, the starter really started to show personality. There were plenty of bubbles, a visible rise, and that classic sourdough aroma. (Watch my how-to video here for day seven)
At this point, it’s important to remember that seven days doesn’t automatically mean “ready.” The key milestone is consistency: your starter should be able to double in size within 4 to 6 hours of feeding, three days in a row. If you’re not there yet, keep going. Generally in the past when I have done anything with sourdough, a new/weaker starter can produce alright bread loaves, but older starters are better.
Day Eight
On day eight, I fed my starter and waited, and it doubled in size again. This is exactly what you want to see. Daily feeds continued, and everything pointed toward a starter that was nearly ready to bake with. (Watch my how-to video here for day eight)
Waiting can be frustrating, but those bubbles and that rise are proof that your starter is waking up beautifully. At this stage, you might also realise… it deserves a name.
Day Nine
By day nine, my starter had doubled in volume within six hours for the third day in a row. That consistency meant it was strong enough for a test bake. (Watch my how-to video here for day nine)
That said, a slightly older starter often performs better, and I personally prefer a 10 to 14 day starter for reliable results. Feeding continued as normal, with plans to keep strengthening it over the next few days.
Day Ten
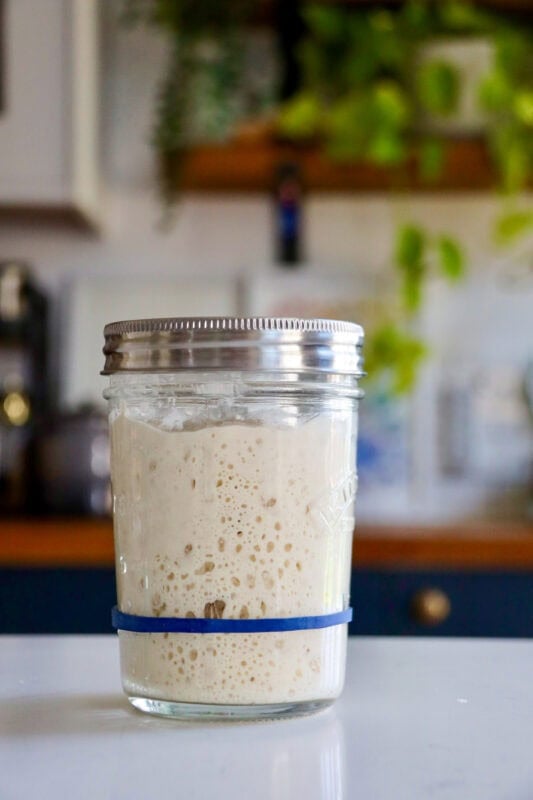
Day ten was all about admiring the structure. After feeding, the starter rose beautifully, with visible bubbles and strength throughout. This is what a healthy starter looks like. (Watch my how-to video here for day ten)
If your starter isn’t quite here yet, don’t worry. Temperature, flour, water, and timing all play a role. Finding what works for you is part of the sourdough journey
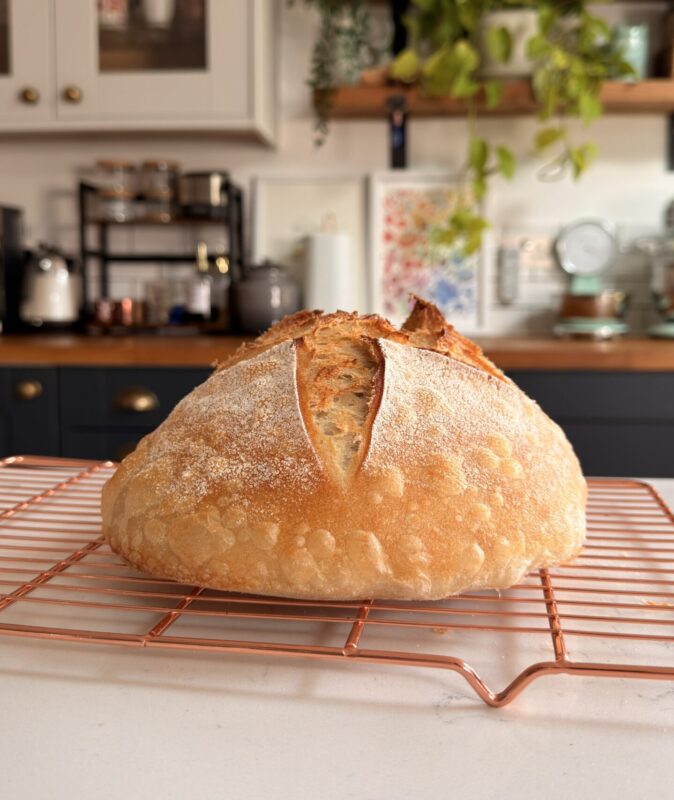
From here, you can start trying to bake whether that’s a simple loaf, recipes using discard, or experimenting with different flours. Or, you can fuel it for a few more days to strengthen it.
If you are happy with your starter, but you are not ready to bake yet, you can store it in the fridge. This prevents the starter from dying and also you unnecessarily overdoing the feeding. When you are ready to bake, take the starter out of the fridge the day before, and feed in the evening so it’s ready to go. I will be posting some sourdough videos in the future, so let me know if you want to see anything in particular.
Sourdough is a lesson in patience, observation, and trust. Stick with it, feed it well, and before long, you’ll be pulling your own homemade sourdough from the oven!
when keeping your starter in the fridge between bakes, should the lid be screwed tight or left loos?
On tightly in the fridge! x
Thank you Jayne. I’ve just started my first loaf with my starter after getting a set for Christmas. How long can I store the left over starter in the fridge? Does it need weekly feedings to keep it going if there is a while between bakes?
Hey! It only really needs feeding if you are going to bake with it – if it’s been in a few days, it probably only needs one good feed before baking with. If it’s been in a while, it may need 2-3 feedings to revive before baking with. Anything more than maybe 3 months, I would feed it just to make sure it’s still okay!
Lucky you………and everyone who can smell bread baking! ✨🍞✨