
Jane's Patisserie » Recipes » Best Baking Recipes » Santa Hat Brownies
Santa Hat Brownies

*This post may contain affiliate links. Please see my disclosure for more details!*
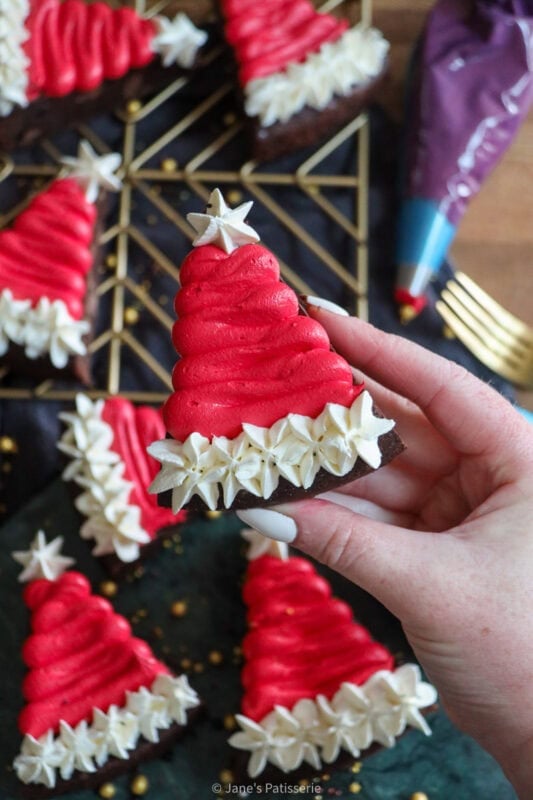
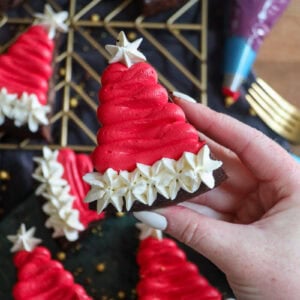
If you are looking for a fun and festive Christmas bake, these Santa Hat Brownies are perfect. They are rich, full of chocolate and very fudgy, and topped with easy to make red and white buttercream frosting. They are cute, delicious and perfect for a festive bake.
These brownies are perfect for Christmas parties, festive gatherings, bake sales, or something fun to do with the kids. The combination of rich chocolate brownie and sweet buttercream frosting is delicious!
Notes from The Patisserie
The base of this brownie is essentially the same as my core brownies that I have made for over ten years. I used the same simple six ingredient brownie base, but adjusted to fit a smaller tin. My Christmas tree brownies are always popular during the festive period, and these are a fun twist on those.
Unlike traditional brownies that are baked into a square tin, these are baked into a round 8″/20cm tin to make portioning easier. I get eight segments out (by cutting in half, half again etc until there are eight in total). This prevents any off cuts that you may get using a square tin.
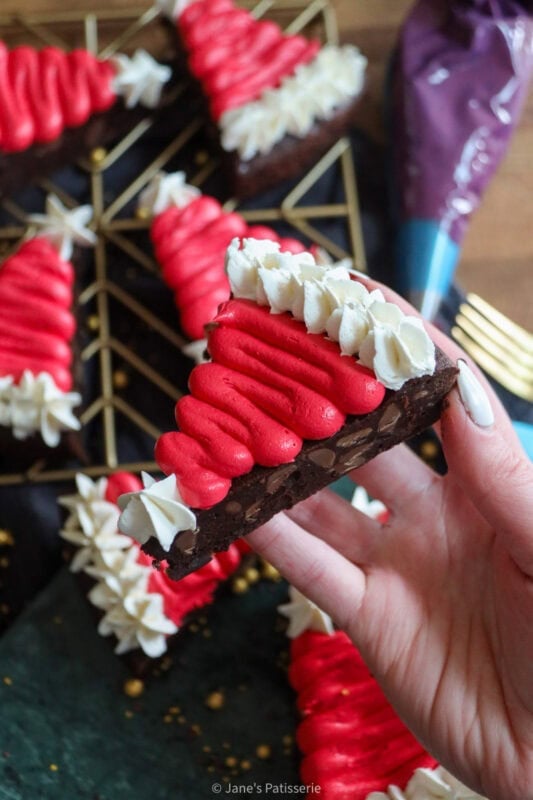
For best results, as painful as it may be, I would ALWAYS recommend setting the baked brownie in the fridge for a few hours (or even over night) to make sure that the chocolate and butter have set again and it has firmed up nicely to be able to cut into the hat shapes.
Ingredient Notes and Tips
For a delicious brownie base, I always recommend sticking to the recipe (full recipe in the recipe card below) but here are some tips on which ingredients to use:
- Chocolate – for the base brownie mix I really do encourage you to use dark chocolate. I would always recommend using 70%+ cocoa content in dark chocolate for best results. Using a lower cocoa chocolate can cause the brownies to not bake properly
- Butter – you can use a block unsalted butter or a baking spread for brownies – generally, block butter makes the brownies set better after baking
- Sugar – I like to use light brown soft sugar for my chocolate brownies these days, but you can swap to caster sugar, or golden caster sugar
- Eggs – as my core recipe has been reduced to fit a smaller tin, I use two medium eggs and an egg yolk. You can use two large and an extra yolk (or if using very large, leave out the yolk)
- Flour – plain flour (all purpose) is best as you do not want any raising agents
- Cocoa powder – extra strong pure cocoa powder is best – I’d recommend avoiding using a hot chocolate powder as they are mainly sugar and don’t have a high cocoa content
I then also add in some chocolate chips (I used milk) but you can add in any you want, or leave them out. You can also flavour the brownie really easily, either by using a flavoured chocolate (such as chocolate orange segments) or you can add in a flavour extract such as 1tsp of peppermint extract.
Decorating a Santa
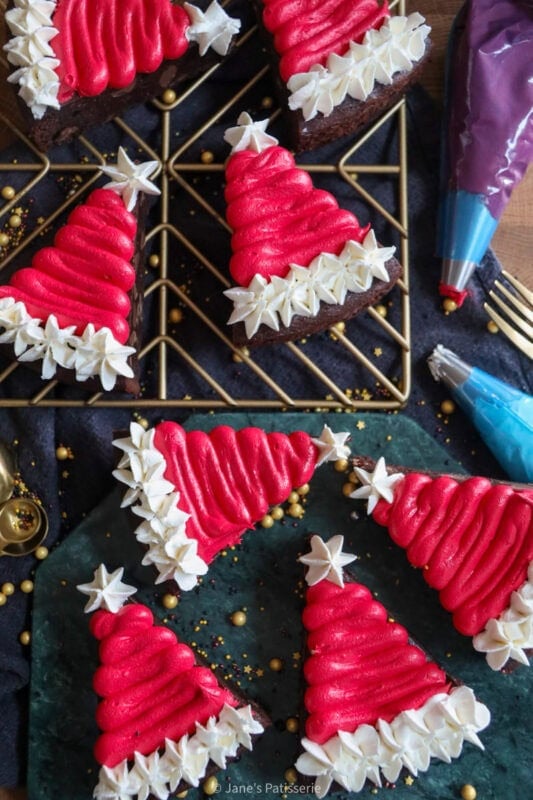
These are a really basic way to create a fun looking bake for Christmas, making Santa’s hat in brownie form. You can of course just decorate them in a different way if you wish (the base works for Christmas trees, reindeers and more) but making a Santa Hat is nice and simple.
- Butter – I would ONLY recommend using block unsalted butter to make buttercream – avoid a baking spread, margarine or butter substitute as they are far too soft
- Red food colouring – I prefer to use an extra strong red food colouring as anything weaker will likely just create a pink colour to the buttercream. I would recommend avoiding supermarket colours as the amount you need to add to get anywhere close to the red colour will likely ruin the buttercream.
- Piping tips – I use a 2d closed star piping tip for the white, and a round piping tip for the red. I use strong piping bags as well.
I would recommend beating the butter well on it’s own to lighten the butter to create a more natural white colour – however, the more you beat the buttercream, the lighter the red will be. You can increase the red colour by using an immersion blender, or the microwave method. Letting a coloured buttercream ‘sit’ for a while can also increase the red colouring.
Santa Hat Brownie Recipe!
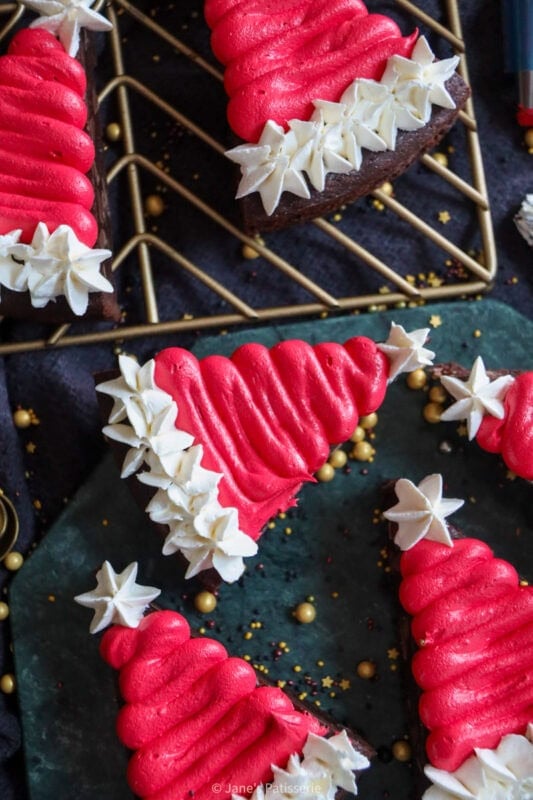
These Santa Hat Brownies are rich, fudgy and very chocolatey, decorated with red and white vanilla buttercream frosting. Fun and easy!
Print
Pin
Rate
Servings: 8 brownies
Ingredients
Brownies
- 125 g dark chocolate (70%+ cocoa content)
- 125 g unsalted butter/baking spread
- 2 medium eggs
- 1 egg yolk
- 170 g light brown soft sugar (or caster sugar)
- 60 g plain flour
- 30 g cocoa powder
- 150 g chocolate chips/chunks (I used milk)
Decoration
- 115 g unsalted butter (room temp)
- 330 g icing sugar
- 1 tsp vanilla extract
- 1 tsp extra strong red food colouring (see blog post)
Instructions
Brownies
- Preheat the oven to 180ºc/160ºc fan and line an 8” round cake tin
- Melt the butter and dark chocolate together and cool – I use the microwave but you can use a bowl over a pan of simmering water
- Add the eggs, egg yolk and sugar to a bowl and whisk until thick – this can take a few minutes
- Fold through the butter/chocolate mix carefully into the eggs and sugar
- Then, fold through the flour and cocoa
- Finally, fold through the chocolate chips/chunks
- Pour into the tin and bake for 20-25 minutes until there is a slight wobble in the middle and leave in the tin to cool fully
- Preferably, set the brownies in the fridge for a few hours
Decoration
- Beat the butter on it’s own until light in colour
- Add the icing sugar and vanilla and mix again
- Remove a third and keep this as white
- Colour the last two thirds with the extra strong red colouring (see blog post notes about this if needed)
- Cut the brownie into 8 sections
- Pipe the buttercream onto the brownie – I do the star at the top in white first, fill the middle with the red, and then finish the bottom with the white
Notes
- These brownies will last for 4-5+ days easily, in a cool place at room temperature or in the fridge.
- These brownies will freeze for 3+ months
- I use this red food colouring
- I use this star tip for the white, and this round tip for the red
- I use this cake tin
Storage and Freezing
These brownies are great as they do last really well. As well as being delicious on the day of baking, they also last for 4-5+ days at room temperature on a cooler day, but also in the fridge. I prefer mine in the fridge, as it keeps the fudgy texture.
These brownies will also last for 3+ months, in the freezer. I would recommend letting the brownies bake and cool fully, and then portioning before freezing (you can also freeze decorated)