No-Bake Biscoff Cheesecake!

*This post may contain affiliate links. Please see my disclosure for more details!*
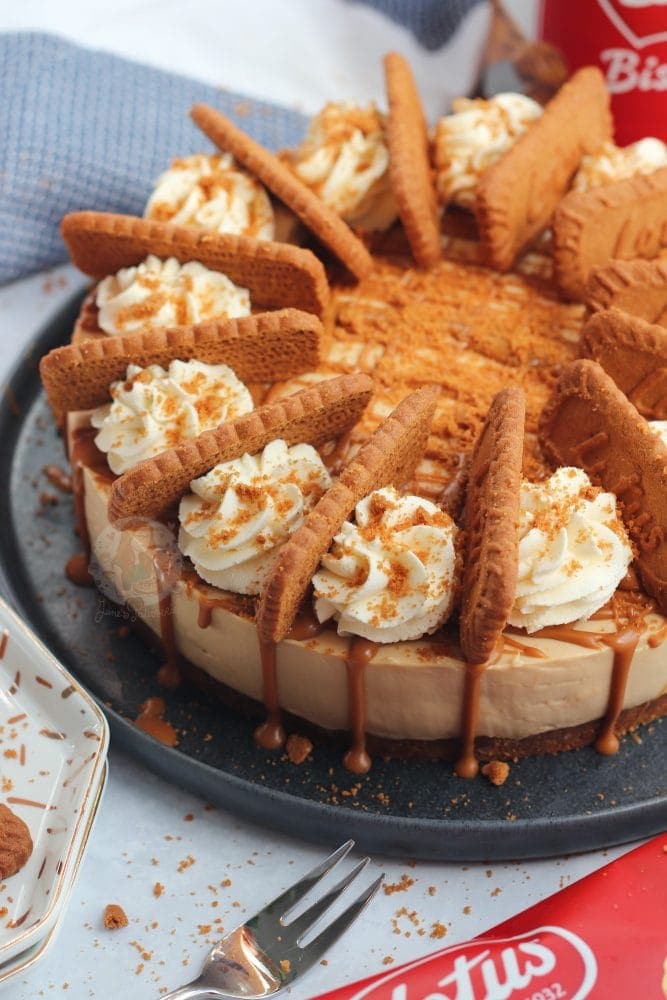
A delicious no-bake Biscoff cheesecake, with a Biscoff biscuit base, creamy Biscoff cheesecake filling, sprinkled with more biscuits and whipped cream and a Biscoff drizzle.
Biscoff cheesecake
Okay, so I am a little obsessed with cheesecake as you might have noticed… but there’s nothing wrong with that? Right? Anyway… this is utterly delicious and different to my other cheesecakes – the Biscoff spread creates a delicious spiced cookie flavour compared to the sweetness of the others on my blog.
This cheesecake suits all of the needs of loving Speculoos/Biscoff, no-bake recipes, and cheesecake in general. It’s utterly scrumptious! I always get a little confused as to whether there is any difference between Speculoos, Lotus, or Biscoff, but the fact that even my local supermarkets in the UK sell something similar at least makes me very happy.

Biscoff
I always thought that I could only get it from the rare american candy shop I came across in the UK or when a friend of mine would bring me back some from the US, but now I can get it all the time! You can find the Biscoff spread in the supermarkets near the Nutella and such!
Honestly, though, Biscoff is genuinely one of my favourite things. My Biscoff cake, Biscoff cookie butter cupcakes and Speculoos/Biscoff cookie butter fudge are just some of the other recipes on my blog using it already. Honestly, its an ever so slight addiction. I even saw some articles about Biscoff spread saying the UK had ‘compared it to crack’ on how good it was when it was introduced a few years ago…


Simple recipe
I’ve made no-churn crunchy cookie butter ice-cream for a while now as my dad loves the flavour of it, but the idea of making a cheesecake just HAD to happen. This recipe is so simple to make, and very very similar (if not the basically the same) method as my no-bake caramel Rolo cheesecake.
Simply mix the biscuit and melted butter to make the base, and whip up all of the cheesecake ingredients and spread it over the base – leave to set and HUZZAH! It’s done! And then I obviously decorate it in some form or another, but this is all optional. The only bits that you really do need is the base and filling ingredients!


Recipe updates
I’ve updated this recipe quiiiiteeee a few times, but that’s just because I have never been a fan of the pictures I have used. Often I will end up remaking something due to the photos and nothing else, but when I originally updated this I did change the recipe ever so slightly. The original ingredients are listed in the notes section of the recipe
I just utterly adore and LOVE Biscoff, and I know a lot of you guys do as well. It’s sweet and spicy at the same time, which makes it a perfect addition to a cheesecake. The spread on top gives a nice rich addition, along with the Lotus biscuits on the bottom. If you don’t want it to be quiiiiteee as Biscoff like, then use 300g of digestives on the bottom with 150g unsalted butter.


Cheesecake filling
When you whisk the mix up, it really doesn’t take too long at all – it takes me about 45 seconds to make the mixture. I whisk the cream cheese, biscoff, icing sugar and vanilla for about 10 seconds. Then, I add the cream in. This then takes another 30 seconds or so, and it’s lovely and thick. This is, of course, dependant on a few things – the temperature of the ingredients, brand of ingredients etc.
- Cream cheese – pretty much ANY full-fat soft cheese works. I would drain any liquid you see on top. Mascarpone is naturally sweeter if you want to use that, and others such as Philadelphia are thick and classic cheesecake
- Cream – use double cream (I’m in the UK – elsewhere it can be called ‘heavy cream’). Our double cream is typically 47% fat content so is very high. If yours is less, you may want to whip the cream separately and then fold through to help it set better
- Sugar – I like to use icing sugar
- Biscoff – smooth, or crunchy – it’s up to you.
I switch between using my stand mixer and my electric hand whisk – but both work very well. You can use either, or neither. When you make a cheesecake without an electric mixer you just have to work a lot harder! It’s also best to whip the cream separately to make sure it’s thick enough! Either way – it will be delicious. You will adore the creamy and delicious taste because of HEAVENLY BISCOFF.


Decoration
Any decoration for the top of my cheesecakes are obviously completely optional. I like to drizzle the spread on top (best to microwave it for about 30 seconds), or I spread the spread all over… and now I think I have said spread too many times.
I use a 2d closed star piping tip for my whipped cream – which is double cream, lightly whipped with icing sugar. Squirty cream that comes out of a can should be avoided as it’s UHT cream and it will almost immediately deflate unless you are serving straight away.
The whipped cream is obviously optional too as I know lots of you aren’t a fan – and the biscuits are too! Obviously, the biscuits will go soft after a while, so if you prefer crunchy biscuits, you will want to leave those until last minute to serve.


No-Bake Biscoff Cheesecake!
Ingredients
Biscuit Base
- 300 g Lotus/Biscoff biscuits
- 125 g unsalted butter (melted)
Cheesecake Filling
- 500 g cream cheese (full fat)
- 100 g icing sugar
- 250 g Biscoff spread (smooth/crunchy)
- 1 tsp vanilla extract
- 300 ml double cream
Optional Decorations
- 150 ml double cream
- 2 tbsp icing sugar
- 75 g Biscoff spread (melted)
- Biscoff biscuits
Instructions
- Blitz the biscuits for the base in a food processor until they're a fine crumb. Mix with the melted butter and press down firmly into an 8"/20cm deep springform tin.
- With an electric mixer (I use my KitchenAid) mix the cream cheese, vanilla, icing sugar and Biscoff spread until smooth.
- Mix in the double cream and whisk until its thick and holds itself completely! (Don't whip it too fast, slow and steady wins the race). Alternatively, you can whip the cream separately to stiff peaks and fold through!
- Spread the mixture evenly over the biscuit base and chill in the fridge for at least 5-6 hours, but preferably overnight.
- Remove from the tin and decorate how you like.
- I whipped together the double cream and icing sugar and piped it on, adding a biscoff biscuit per slice and drizzled over some melted biscoff!
Video
Notes
- I updated this post in May 2017. The original recipe used:
- 150g of digestives
- 150g of Lotus biscuit
- 150g unsalted butter
- And 2x 280g of the Philadelphia cream cheese
- For this recipe you can use either mascarpone or Philadelphia, both work perfectly. However, either MUST be full fat
- You might find it easier to melt the spread for 10 seconds before you try and decorate with it
- This cheesecake will last for 3 days in the fridge, once set.
ENJOY!
Find my other Cheesecake & Biscoff Recipes on my Recipes Page!
You can find me on:
Instagram
Facebook
Pinterest
Twitter
Youtube
J x
© Jane’s Patisserie. All images & content are copyright protected. Do not use my images without prior permission. If you want to republish this recipe, please re-write the recipe in your own words and credit me, or link back to this post for the recipe.
SaveSave
Hi Jane, just finished making this amazing looking cheesecake! I did everything by the book (so to speak), but ended up really runny, I used my kitchen aid using the whisk attachment? Or should I of used the paddle to start with, then change it to whisk when adding the cream? It is now in the fridge anyway, so fingers crossed it sets, going to give it a good 12 hours before trying to remove it from the tin! It is possible I over mixed it when I added the cream, so we will see how it turns out, which is agony as I have no patience xx xx
You don’t need to change the attachment, but chances are you over did it if it ended up runny. If its a little soft when you want to serve it you could shove it in the freezer for a little bit to firm it up! x
YUM!!!! Fantastic recipe, really easy to follow and make. I’ve tried to make cheesecakes in the past, but have never managed to get them to set as well as this one did. Went down a hit for my works bake day.
Thank you Jane, keep up the good work 😀
Oh thats amazing, I am SO glad you loved it so much! Thank you! xx
Does this taste cheesy like a cheesecake? I don’t like cheesecake but I once tasted a lotus cake that was supposedly cheesecake but tasted more like a creamy pie cake not so much cheese cake does this taste like that? Or is it very cheese cake-y
None of my cheesecakes taste cheese-y.
Hi,
I would like to make this cake for my husband’s birthday. Is the butter salted or unsalted for the base? Also, if the cheese filling ends up to be runny, is it okay to add gelatin or freeze it for a few mins before refrigerating it. Let me know.
Thanks.
I personally use unsalted, but it’s up to you. You can add gelatin if you wish, but I personally don’t like it! However do NOT freeze it straight away, you’d have to set it in the fridge first for at least 5-6 hours and then freeze it otherwise it won’t work.
Hi is it alright if I put your recipient in my blog but given e full credit to you ? If not I will just mention I got the idea from you and link the recipient onto your page
Please could you mention and link to my blog for the recipe, I’d much prefer that 🙂
No problem sure ??
Do I need to line the tin in any way?
I don’t but you can if you wish
Thx
Btw just tasted mixture and it’s amazing
Hi! What does the 2x280g mean actually? Kinda confused on that part, haha. Does it mean I need 560g of the cream cheese?
Its two of the 280g packets of philadelphia cream cheese so yes, 560g.
Ooh!! Thank you so much! Can’t wait to make this for my dad’s birthday! Thank you!
Hi! in the recipe you’ve written 500g cream cheese, but in this comment 560g? Which is it?
I’ve literally just updated the post, either is fine.
That is the best spoon lick I’ve ever had! Can’t wait to eat it…….
Haha thanks!!
Seen this recipe and looked great!? But when I was making the filling it didn’t quite thicken and started to look curdled. Just went with it and put it in the freezer to see if it will eventually set. Was I meant to whisk the double cream first before adding it in with all the other ingredients?? Xx
How I do it, is how its written in the recipe.. so no, in my method you don’t have to whip the cream up before. However, some people do! Were you using a stand mixer or a hand whisk? x
I used an electric hand whisk? X
Okay as the surface area that you’re whisking is smaller in comparison to a stand mixer it’s easier to curdle if you go to fast 🙂 so if you ever try again, try not to go too fast and move the mixer about a bit more to prevent it x
Looks so tasty! I’d love to make this, but double cream isn’t available in my country.. Any suggestions to replace it? In previous cheesecake recipes I used 1/3 whipped cream and 2/3 mascarpone instead of double cream. Thank you 🙂
Umm I would say try what worked for you before as it really depends on fat content of the whipping cream if that makes sense? But if your method worked then go for that!! 🙂
Sorry have you whisked the cream or have you not whisked the cream? I don’t understand x
OMG I made this for my hubby’s birthday dinner last night it was so delicious and I had many many compliments from the guests. Hubby is a chef and rarely comments on his food but did say how amazing it tasted and how it looked so professional so thank you Jane I will be back in the future for more recipes to impress xx
Oh yaaayyy! I’m so glad it was such a success! Thank you! 🙂 xxx
Hello! Can i substitute the double cream with Philadelphia cream cheese?
No you need the cream as you already have cream cheese in it..
Hello. Just finished making this and hoping I whisked it long enough for it to set, had a cheeky taste of the cream cheese itself once I’d poured it into its tin, that in itself tastes lovely. Can’t wait to decorate it, even put some of mixture in a mini ramekin for myself as my tin is half an inch less in diameter than the one you recommended. Least then I can leave the big one intact til my picnic on Monday. 🙂 Massive thanks
Hiya!
Oh well I’m sure you did – and I’m glad it tastes delicious! I hope everyone at the picnic loves the cheesecake too! x
Hi Jane. Your no bake cheesecake was a total hit with my in laws tonight!! Was so easy to make and turned out absolutely delicious
Thank you so much!!
Ahh that’s amazing! I’m so glad! 🙂
After a weekend of Referendum related anxiety, to take my mind off things I did what I do best, bake! This recipe was the perfect treat for the job, such an amazing, easy and delicious recipe, thank you! ?
Hahaha this is amazing, I’m so glad to have helped during such a time ❤️