NYC Chocolate Chip Cookies!

*This post may contain affiliate links. Please see my disclosure for more details!*
Giant, gooey and utterly delicious NYC chocolate chip cookies based on the famous cookies from New York City!!
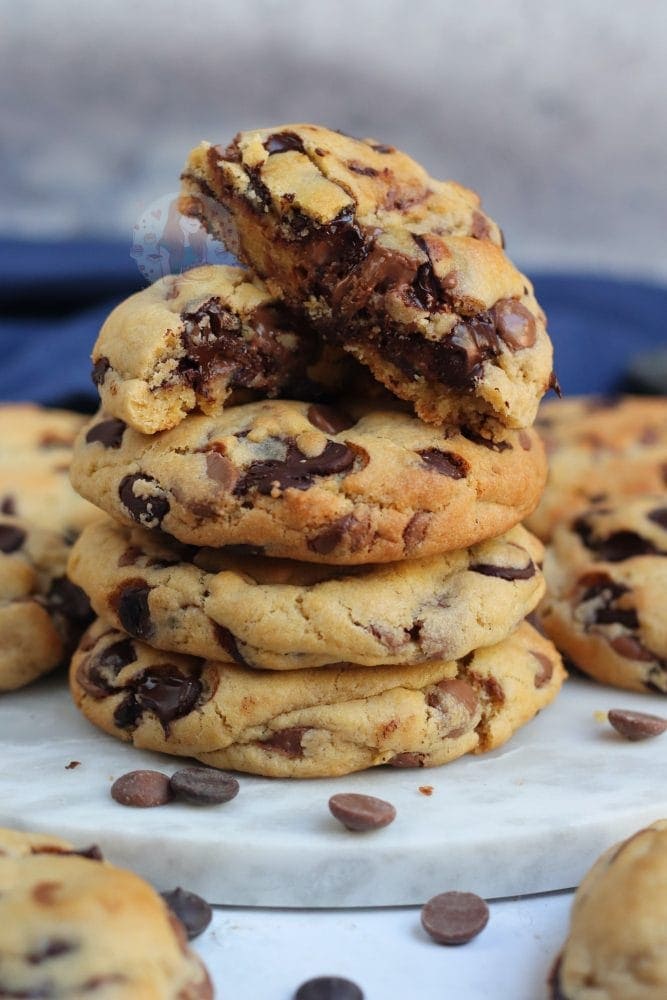
NYC chocolate chip cookies
Can we take a minute, right at the beginning of this blog post, to appreciate… that I have given you guys this recipe. I have finally given you all the recipe that you have been after, for such a long long time. QUEUE THE APPLAUSE.
I’m joking – seriously. But anyway… I will say the reason they took this long to come to my blog, is because I only, finally, went to New York four months ago, so I finally got to try some classic NYC cookies for myself!
I wasn’t prepared or willing to post an NYC chocolate chip cookies recipe before I had actually eaten some for myself! I feel like that is pushing the limit really… can you make a recipe for something as famous as this, if you haven’t even there and eaten them?!

Levain Bakery
Anyway. When I was in New York, I ate so. many. cookies. The best of all, for me personally, was the ones from Levain Bakery. Oh, holy geeeeeeee they were insanely epic. I heard lots and lots of talk about Levain Bakery on my social channels before I went, and my gosh they did not disappoint.
I managed to get in when there was absolutely no queue, and then trotted over to Central Park to enjoy them, and my gosh it was the best thing ever. Not only was I finally taking in the sites of Central Park, in actual New York City, but the cookies… wow.
When it comes to making a recipe for them though, I will say that these are not authentic Levain Bakery cookies, as I just don’t think they can be recreated. I really don’t. There are many great NYC chocolate chip cookies recipes out there – this recipe from Modern Honey is great, so is this one from Cupcake Jemma, or this one from Kirbie Cravings!

Recipe
I have honestly made about 20 batches of cookies now, to get these right. There are so many factors when it comes to making these cookies – and jeez it’s hard to get them all right. When researching into recipes, what Levain Bakery and other bakeries such as Creme in London and so on do.. it is a bit of a mix. What flavours actually go into them, what order you put the ingredients in, and so on! Lots of recipes use a mix of two flours, but I like to stick to just one!
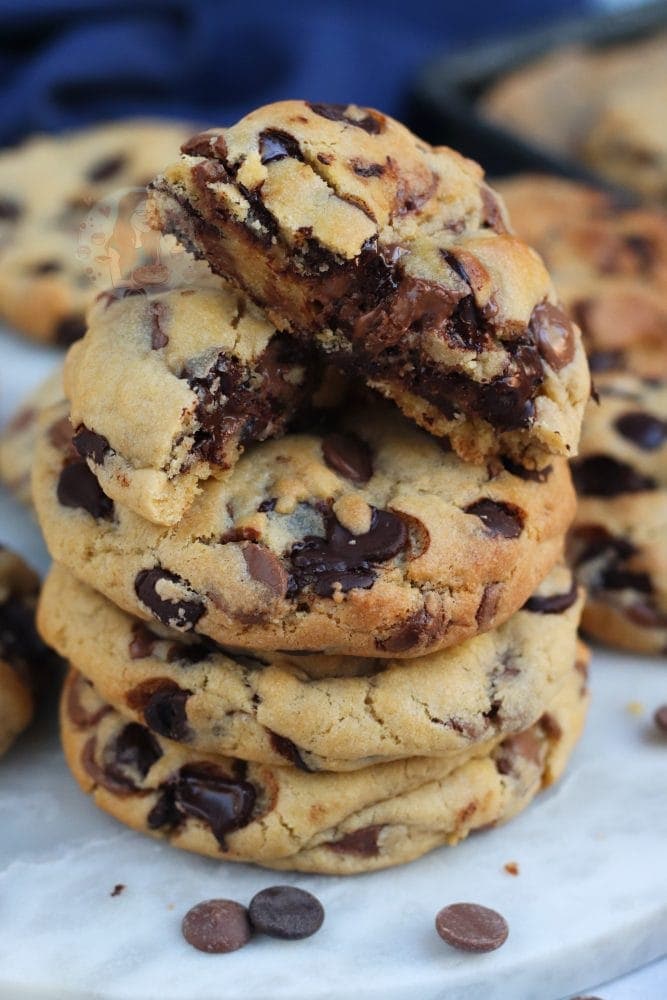
I basically just wanted to create giant chocolate chip cookies, that resemble NYC chocolate chip cookies, that are easier to make. They are definitely different from the rest of my cookies, but that’s what we want – NYC cookies are a world of their own. I teased this post on my Instagram a little while ago and you guys went crazy for them… so I hope you are READY!!
This recipe is quite easy to follow, luckily. I wanted to make it as simple as possible – but obviously any questions, leave them below.


The cookie dough
The cookie dough for this recipe is quite similar to the other NYC Cookie recipes I’ve shared on my blog – the basic cookie dough, as you will see can be used in so many variations, but they work for me – so why change it?
- Butter – I use fridge-cold baking spread or room-temperature block butter, but either works well.
- Sugar – A blend of granulated sugar and light brown soft sugar enhances the flavour and gives the cookies a rich taste.
- Egg – I usually bake with medium eggs, but you can substitute with one large egg if that’s what you have on hand.
- Flavours – Vanilla extract is optional but add a wonderful depth of flavour.
- Flour – Always use plain flour for your cookies! Self-raising flour will result in a cake like texture, which you want to avoid.
- Raising Agents – I use both bicarbonate of soda and baking powder. Bicarb is the traditional choice for cookies, while baking powder helps achieve the signature texture of a New York-style cookie.
- Salt – I add sea salt to my cookie dough because it enhances the flavours, but you can skip it or use salted butter if you prefer.
Sugar
I use a mix of two sugars… light brown sugar (soft), and white granulated sugar. This is similar to my other recipes, such as my Mini Egg cookie bars – in the fact that it gives the best flavour and texture. You really want to stick to these if you can – but you can use all brown, or all white if you have to.
Switch the sugars to caster sugar can really change the texture. I’m not the biggest fan of caster sugar in cookies anymore – and if you try this recipe as listed, you will agree with me. There is alot of science behind sugars in cookies – and if you can grab the listed sugars I will promise you, they will be better.


Flour
Now when it comes to the flour… I stand by using cornflour in my other recipes. I really honestly do. I even think these are better with a bit of cornflour. The cornflour creates a softer texture in the cookie, without drying the cookie out. It’s perfection. However, a lot of you don’t like using it.
A lot of NYC Cookie recipes use a mix of flours, but again I wasn’t a fan… I wanted to make it be fewer ingredients. However, you can switch it up. You can easily use self-raising flour instead of plain, but you would then only use the bicarbonate of soda, and no baking powder
I use all plain flour and add in the baking powder to get the texture, and I love it. You want the rise from the raising agents to create the perfect texture.. and it really works! You want a decent amount of flour, and to help it raise to get the classic texture so that when you bite into it… heaven.


Chocolate?!
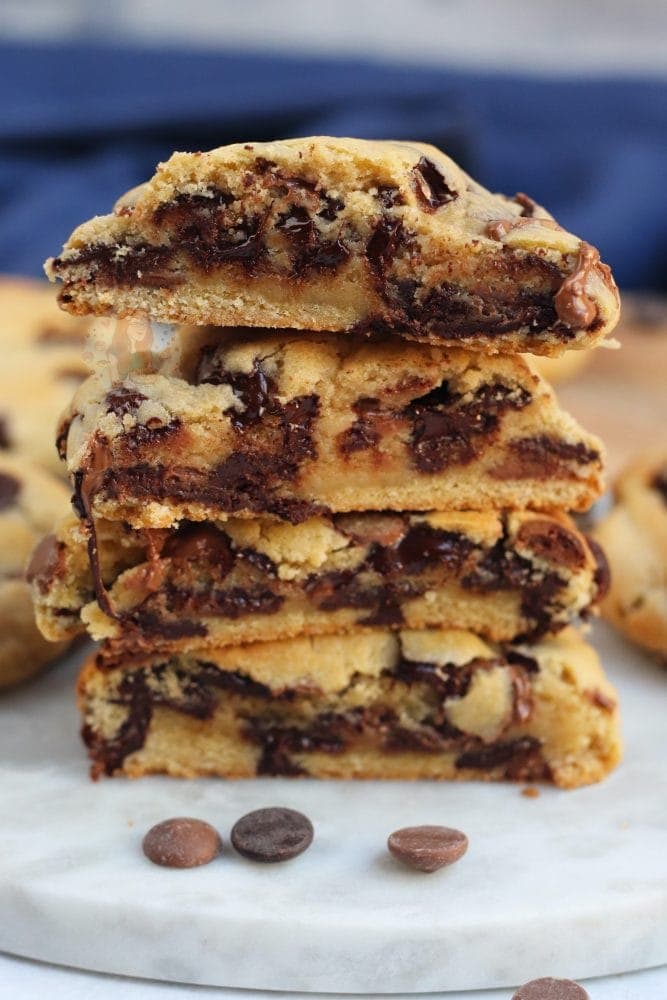
When it comes to the chocolate chips, I, as always, use actual chocolate chips. I use a 50/50 mix of milk chocolate and dark chocolate. You get the sweetness from the milk chocolate, but also some bitterness from the dark chocolate which creates the balance. You can, of course, use all of one or the other.
I like to use baking chocolate chunks as they are slightly larger, but you can use bars of chocolate that you can chop up, or you can use any supermarket chocolate chip. Honestly, any work. You can use a mix of other flavours of chocolate as well, or even adapt to include extras. I just wanted a base recipe on this particular recipe post.


Tips & Tricks
- These are best eaten on the day of baking, but can be revived by microwaving for 15-30 seconds, or putting into a hot oven for 2-3 minutes
- You can freeze the raw cookie dough easily, and bake from frozen if you don’t want to bake the entire batch
- If you are baking straight from frozen after some time, I usually bake for the same 12-14 minutes, at the same temp, but an extra couple minutes won’t hurt
- Once baked, these will last for 4-5+ days
- You can use any chocolate you fancy, I just love the combination of milk and dark chocolate
- You can use chocolate bars chopped up instead of chocolate chips, just make sure the chunks aren’t too big
- If your oven runs hot you will want to reduce the temp slightly as mentioned in the method
- If you prefer your cookies flatter, you can squish them down slightly before baking but I don’t do this personally
- If you want a lovely texture – you can add in 1 level tbsp of cornflour, and take out 25g of the flour
- If you can’t access one of the sugars, use all of the other one – i.e. all granulated, or all light brown sugar. Using other sugars can change the texture.
- If you want to make smaller cookies (60g) – they take about 9 minutes to bake


NYC Chocolate Chip Cookies!
Ingredients
- 125 g unsalted butter
- 100 g light brown sugar
- 75 g white granulated sugar
- 1 medium egg
- 1 tsp vanilla (optional!)
- 300 g plain flour
- 1 + 1/2 tsp baking powder
- 1/2 tsp bicarbonate of soda
- 1/2 tsp sea salt
- 300 g chocolate chips (150g dark, 150g milk)
Instructions
- Add your butter and sugars to a bowl and beat until creamy - I use my stand mixer with the beater attachment
- Add in your egg, and beat again. If using vanilla, add it in now
- Add in the plain flour, baking powder, bicarbonate of soda, and salt and beat until a cookie dough is formed
- Add in your chocolate chips and beat till they're distributed well
- Weigh your cookies out into eight cookie dough balls - they're about 120g each
- Once they're rolled into balls, put your cookie dough in the freezer for at least 30 minutes, or in the fridge for an hour or so
- Whilst the cookie dough is chilling, preheat your oven to 180C Fan, or 200C regular! If your oven runs hot, go for 160C-170c.
- Take your cookies out of the freezer/fridge and put onto a lined baking tray. I put four cookies per tray
- Bake the cookies in the oven for 12-14 minutes. I don't personally flatten the cookies, as they flatten enough during baking - however, if you like flat cookies, flatten them a bit before baking.
- Once baked, leave them to cool on the tray for at least 30 minutes, as they will continue to bake whilst cooling
- ENJOY!
Notes
- These are best eaten on the day of baking, but can be revived by microwaving for 15-30 seconds, or putting into a hot oven for 2-3 minutes!
- You can freeze the raw cookie dough easily, and bake from frozen if you don't want to bake the entire batch!
- If you are baking straight from frozen after some time, I usually bake for the same 12-14 minutes, at the same temp, but an extra couple minutes won't hurt!
- Once baked, these will last for 4-5+ days!
- You can use any chocolate you fancy, I just love the combination of milk and dark chocolate!
- You can use chocolate bars chopped up instead of chocolate chips, just make sure the chunks aren't too big!
- If your oven runs hot you will want to reduce the temp slightly as mentioned in the method!
- If you prefer your cookies flatter, you can squish them down slightly before baking but I don't do this personally!
- If you want a lovely texture - you can add in 1 level tbsp of cornflour, and take out 25g of the flour!
- If you can't access one of the sugars, use all of the other one - i.e. all granulated, or all light brown sugar. Using other sugars can change the texture.
- If you want to make smaller cookies (60g) - they take about 9 minutes to bake!
ENJOY!
Find my other Traybake Recipes on my Recipes Page!
You can find me on:
Instagram
Facebook
Pinterest
Twitter
Youtube
J x
© Jane’s Patisserie. All images & content are copyright protected. Do not use my images without prior permission. If you want to republish this recipe, please re-write the recipe in your own words and credit me, or link back to this post for the recipe.
Hello, trying out this recipe for the first time. I tried your Gingerbread NYC cookies, those are next level in terms of flavour!
I am struggling with a few things:
1) How long to cream my sugar and butter?
2)How long to cream the sugar/butter mixture once the egg and vanilla are added?
3)I live in Canada, am I to bake the cookies in a preheated 400 degree Fahrenheit oven?
I usually cream the sugar and butter until smooth, same with adding the egg. I personally have found melting the butter in the microwave for 30 seconds makes it easier and gives better texture
Yes 400f would be fine
Morning folks.
Love this recipe – I have done it many times and have 24 of them chilling in my freezer as I type! The issue i have is my dough is always pretty short, but these batches are extremely short! Literally like breadcrumbs. My intention with these batches was to freeze as a roll, which I’ve done many times before, and give to family members to pop in their freezers for Christmas eve cookies, but there’s no way this would work with these. They are fine now, but they really took some moulding together, bit worried this might make them tough through overwork – time will tell I guess. Wondering if anyone had any clue as to why this is happening – the recipe was followed exactly, with the cornflour substitute, with the exception of white and milk choc instead of milk and dark.
I had this same issue, breadcrumb like texture. I started adding a tablespoon of water at a time until the texture was right but ended up making the dough too wet, so now, I melt the butter first and it’s perfect every time!
Are you substituting all the flour for cornflour? It’s only supposed to be 1tbsp cornflour for 25g of the plain flour. So use 275g plain flour and 1tbsp cornflour
Hi Jane, amazing recipe I love it. If I made these and left them in the fridge uncooked in balls instead of the freezer, how long do they last please? I stupidly forgot to put them in the freezer, hoping they’re still ok x
The max in the fridge unbaked is 48 hours x
Hi Jane. I love these as my go to cookie. If I wanted to make these choc orange using orange essence, what measurement would you suggest? Thank you
1-2tsp! X
Can I brown the butter? 🙂
Hi Jane, thanks for this recipe. This is my first time making cookies of any kind. I used some cornflour and removed the plain like you mentioned. I weigh them out 120g it made 7 not 8 😐 so I put 4 on one tray and 3 on the other… I cooked them on 200c for 12 minutes they spread out and merged together. Any idea why this could be? I will definitely make these again but would like to do it right 😂
Thanks again if anything the house smells great!
Did you set them in the fridge? Also I don’t flatten them on the tray, they shouldn’t spread too much when baking
Hello! I’m planning to make these tomorrow and can’t wait. Unfortunately I don’t have a kitchen scale right now. Are you able to tell me the measurements in cups for the dry ingredients or can I just do a Google conversion? Thank you!
Incredible!!! I’ve been trying all these cookie recipes online to find the best one and this is by far my favourite one with rave reviews from anyone who’s had them!!
I love the dough so much I would put half the amount of chocolate chips. I also made them 60g each instead of 120g as I personally can’t have a giant one each time.
Absolutely mind blowing. Thank you for sharing 🩷
This is my favourite cookie recipe! I want to make up some layered dry cookie ingredient jars as party favours. Do you think this recipe would work as an ‘all in one’ method with people adding their own butter and egg? Or is it essential to beat the butter and sugar on their own to begin with?
Without mixing it in this method it could just result in a different bake and cookie texture x
For anyone who is interested, I tried this out! I chucked all the dry ingredients in a bowl then roughly combined the butter and egg with a knife. I then finished mixing by hand, scrunching it until it all came together. I shaped and baked as usual. They were slightly more cakey than usual but still a perfectly delicious cookie! I’ll definitely be making up those cookie jars I was planning as party favours!
The cookies are great but how do I keep them from going stale, fridge or just Tupperware?
Thanks
They keep well for a day or two in a tupperware and are super nice if you give them a few seconds (literally seconds) in the mircrowave to slightly warm them, but if you are not going to eat them all I would recommend making the dough in to balls and freezing them. Just cook one or two as you need. They keep for ages in the freezer and come out brilliantly.
Hi!
I’m not sure if i have missed it if there is one but do you have the nutritional information for these? eg calories.
Thanks:)
Hi Jane 🙂
This is one of my favourite recipes!
If I wanted to make 16 cookies, do I just double the ingredients?
Yes, you do! x
Good morning. My name is Rob. I have a micro bakery that primarily produces artesan breads, sourdough breads and some pastries. Cookies are a huge sell anytime. But, Ive been trying to come up with a recipe that would work in my bakery. I worked on so many recipes for almost a year and none were worthy. I couldnt create a choco chip cookie that would hold any form at all. Frozen, didnt matter. I watched and saved this recipe and the first thing that struck me was the amount of butter. Almost half of any recipe I tried. Ok. I was concerned. But, last night, I blended butter and sugars for this recipe for 10 minutes, built the dough, added the chips and the texture was excellent. Baked them, cooled them, tested…. on my 11 year old daughter. Of course, I did the first test. These are incredible. The best tasting choco chip cookie I have ever had. no kidding. The edges where it was browned was slightly crystalized with the sugar and gave these this special crispy goodness. Just an excellent cookie. I am going to use this base in my bakery and see how people respond. Thank you so much for sharing your recipes. Looking forward to more. BTW. I am an american living in Brasil.