Jane's Patisserie » Recipes » Best Baking Recipes » Pumpkin Patch Brownies!
Pumpkin Patch Brownies!

*This post may contain affiliate links. Please see my disclosure for more details!*
Rich gooey chocolate brownies, chocolate buttercream frosting, oreo dirt and buttercream pumpkins make the best pumpkin patch brownies ever!

Pumpkin patch brownies
We are halfway through October, and I still have a good few bakes to come for spooky season… although, these pumpkin patch brownies aren’t necessarily spooky, they are cute and delicious instead. JUST LOOK AT THEM!
I wanted to do a halloween themed brownie because they are just fun to do – and couldn’t work out whether to do a graveyard brownie, or creepy sweets making something spooky, but a pumpkin patch brownie?! Even better!

Brownies
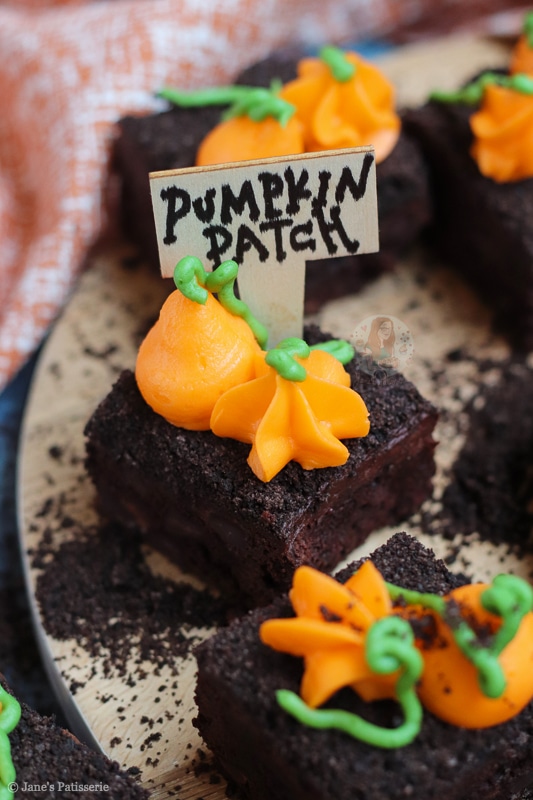
Can we just appreciate for a second, how cute they are?! I am slightly obsessed with the fudgey chocolate brownie base, a delicious chocolate buttercream frosting, oreo ‘dirt’, and cute little buttercream pumpkins.
I used my standard and utterly delicious brownie base for these – the back to basics brownies is my favourite ever, and it works perfectly. Why mess with something that isn’t broken right?! Honestly, these are the best.


Chocolate
It’s important when baking these pumpkin patch brownies to use at least 70% or richer dark chocolate so that you get the best bake. Don’t worry, they don’t taste ‘dark’ at all as you have the additional sugar and chocolate chips to balance them out.
I used dark chocolate chips for this bake as I wanted to keep it dark in colour, to represent the ground better, but you can use whatever – the frosting is also a chocolate buttercream frosting to keep the ‘darker’ dirt colour of the bake.


Method
With these pumpkin patch brownies, it’s best to melt the dark chocolate and butter together until smooth, and let it cool whilst you carry on. I use light brown soft sugar and the eggs, and whisk them together using my stand mixer – this bit is so important as it’s also how you get the best bake.
Using the light brown soft sugar is optional, you can use dark brown soft sugar or even caster sugar – but when you add the sugar and eggs together you will see it looks quite sloppy and darker in colour. Once you have whisked the eggs and sugar enough, the colour will be much lighter and the mixture more mousse like!
You need to CAREFULLY fold the cooled dark chocolate and butter into the eggs and sugar, do NOT use a mixer for this bit. If you use a mixer, you will ruin all the hard work that you did before – then, carefully fold in the plain flour and cocoa powder.


Buttercream and Oreos
I used a simple chocolate buttercream frosting on my pumpkin patch brownies to stick the oreo crumbs to – these are just really finely ground (with the creme still in the middle) and then stuck down onto the buttercream.
You need to make sure the oreos are really pushed down and not loose, so that you can pipe the pumpkins straight onto the ‘dirt’ base. If they are too loose, the pumpkin may struggle to stick. You can sprinkle on more oreo dirt later though, depending on how you want your pumpkin patches to look.

Pumpkin piping
I used two random piping tips to make my pumpkins a bit random – a jumbo round tip, and a 2d closed star piping tip. I then used a small round piping tip to create the green tendrils for the pumpkins. The mini signs are just random little signs I bought from Flying Tiger once!
As always, all of my bakes are customisable – you can flavour the brownies or buttercream whatever you want, but I stuck with the basics so I could concentrate on the look instead! I hope you love this recipe, enjoy. x


Pumpkin Patch Brownies!
Rich gooey chocolate brownies, chocolate buttercream frosting, oreo dirt and buttercream pumpkins make the best pumpkin patch brownies ever!
Print
Pin
Rate
Servings: 16 Pieces
Ingredients
Brownies
- 200 g dark chocolate
- 200 g unsalted butter
- 4 medium eggs
- 275 g light brown soft sugar
- 100 g plain flour
- 50 g cocoa powder
- 300 g chocolate chips
Decoration
- 200 g unsalted butter (room temperature)
- 400 g icing sugar
- 26 g cocoa powder
- 1 tsp orange food colouring
- 1/4 tsp green food colouring
- 75 g Oreos (finely crushed)
Instructions
Brownies
- Preheat your oven to 180ºC/160ºC fan and line a 9" square baking tin with parchment paper!
- Melt the dark chocolate and unsalted butter together until smooth in the microwave or in a bowl over a pan of simmering water. Leave to cool for a few minutes
- Using an electric whisk/stand mixer, whisk the eggs and light brown soft sugar together for a few minutes until the mixture has doubled in volume, is alot paler, and leaves a trail for a few seconds when you lift the whisk out.
- Pour the chocolate/butter mix into the whisked sugar and eggs and fold through very carefully.
- Add in the flour and cocoa powder and fold through carefully again.
- Add in the chocolate chips and fold in and then pour the mixture into the tin!
- Bake in the oven for 25-30+ minutes or until there is a very slight wobble in the middle.
- Leave to cool in the tin - and then 'set' the brownies in the fridge for 3-4 hours.
Decoration
- Once the brownies have cooled and set - beat the unsalted butter on it's own for a few minutes.
- Add the icing sugar into the beaten butter and beat for a few minutes to soften and combine.
- Put half of the buttercream into another bowl and beat in the cocoa powder until smooth.
- Add a couple of spoonfuls of buttercream into another bowl and colour this one green, and colour the rest orange. You should have three different buttercream at this point.
- Spread the chocolate buttercream onto the brownies, and press the oreo crumbs into the buttercream quite firmly.
- Portion the brownies now - I did 16 squares.
- Using whatever piping tips you prefer - I used a jumbo round tip and 2d closed star piping tip, pipe some pumpkins onto each brownie.
- Using a small round piping tip with the green food colouring, pipe some tendrils onto the pumpkins as well.
Notes
- You can flavour these brownies whatever you want using flavour extracts!
- These last 3-4+ days
- I use this dark chocolate in my baking
- I used this baking tin for the brownies
- I used this orange food colouring for the pumpkin buttercream
- I used this green food colouring for the 'tendrils.
- I used this 2d closed star piping tip and this jumbo round piping tip for the orange buttercream.
- I used this small round piping tip for the green.
ENJOY!
Find my other Recipes on my Recipes Page!
You can find me on:
Instagram
Facebook
Pinterest
Twitter
Youtube
J x
© Jane’s Patisserie. All images & content are copyright protected. Do not use my images without prior permission. If you want to republish this recipe, please re-write the recipe in your own words and credit me, or link back to this post for the recipe.
Hi, can you tell me why you use light brown sugar in this brownie recipe but caster sugar in the other brownie recipes? Thanks!
I have only just realised I do not have 70% dark chocolate, I do however have regular dark chocolate, can I still use that? Or would it ruin my Brownies? Thank you
Hey Jane, For the brownie part, do you need to use actual butter or is stork fine?
Hiya! Either should be fine! Enjoy! x
Loved making these, easy to do but the brownie seemed quite dry, not sure if I baked it too high and I only put in 100g of chic chip. How do you make sure the brownie is really moist?
Hiya! Yes – this sounds like they were over baked! Hope this helps! x
Great recipe, made it for school today and everybody loved it. Thanks 🥰
Must try these for the kiddies on Halloween they look great love you recipes slowly working my way though your amazing book absolutely brilliant 🤩
Jane, no matter how hard i try, i cannot get the vivid colours on my buttercreams/cakes that you do! i have used several different colourings, but it just doesnt happen and is so disappointing, when you want a blue and it goes darker and darker grey! as for getting bright ORANGE for pumpkins, after adding COCOA POWDER, which makes it dark brown, i mean, HOW ON EARTH???? I have spent so much money on colourings, gels, powders, etc and NEVER got the results…. 😭
Hiya! To get nice vivid colours, please use the food colourings I’ve linked on the recipe. Hope this helps x