Jane's Patisserie » Recipes » Best Baking Recipes » Melted Ice Cream Cake!
Melted Ice Cream Cake!

*This post may contain affiliate links. Please see my disclosure for more details!*
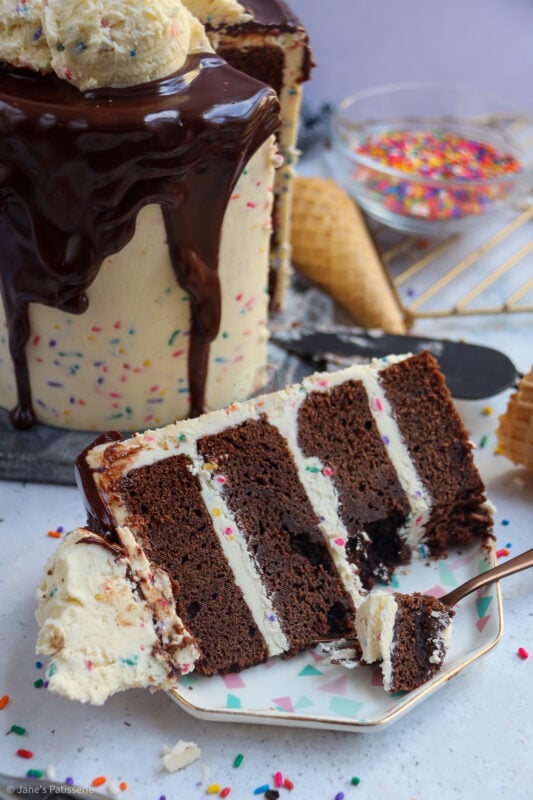
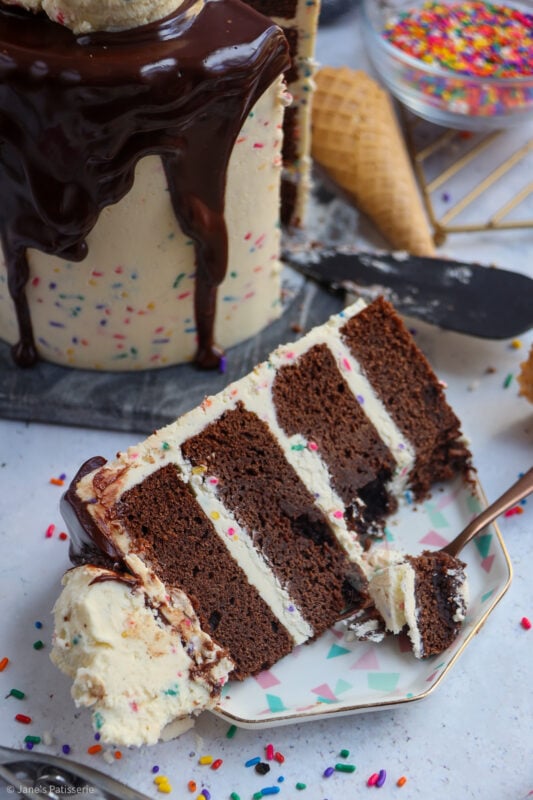
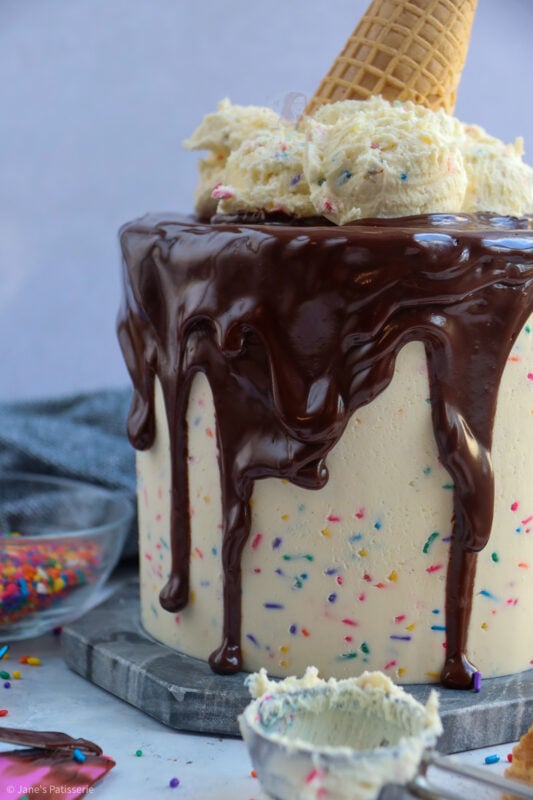
A four-layer chocolate cake with vanilla funfetti frosting and all of the chocolate drip for an amazing melted ice cream cake!
We all remember the ice cream upside on a cake trend right?! Well, I am here ~several~ years later to bring it back because I love them still, and I am just obsessed with how this cake looks in every single way.
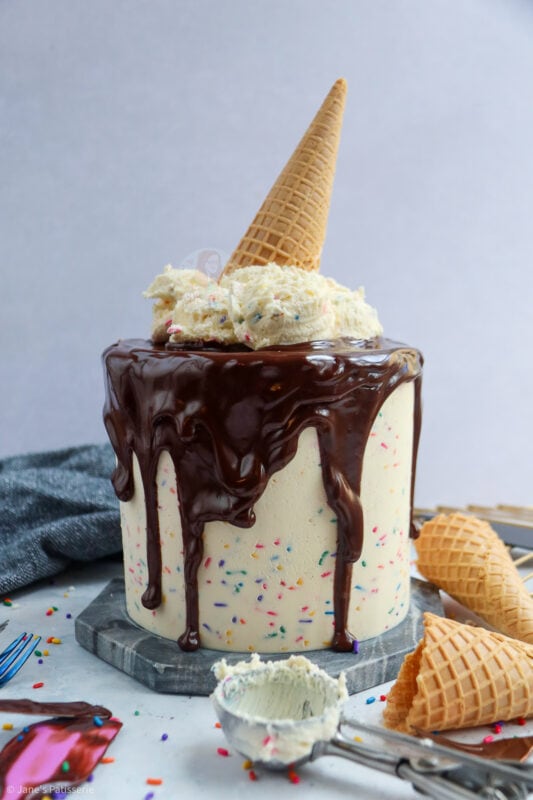
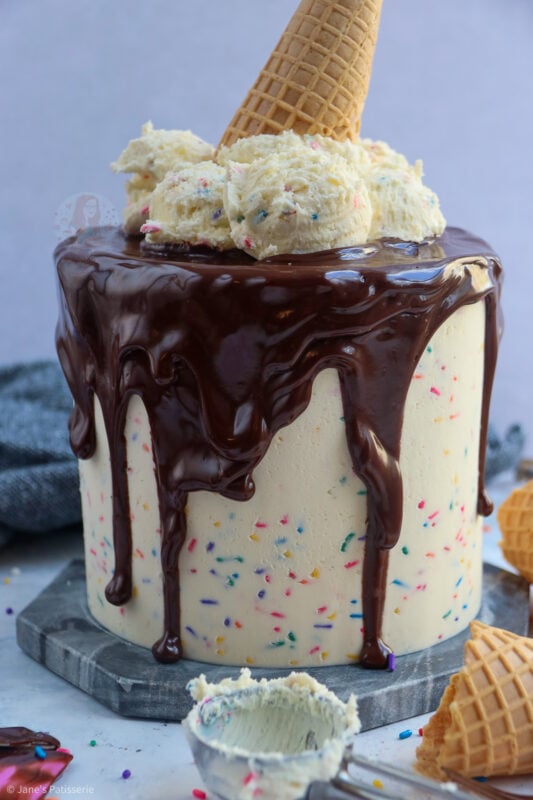
I wanted to create a really pretty cake that is also absolutely delicious, and here it is! A ‘melted ice cream cake’ made with four layers of sponges, buttercream dotted with sprinkles, a delicious chocolate drip and of course, the ice cream cone!
Sponges
For a cake like this, you want something sturdy, delicious and easy to bake… so I went chocolate cake! I know I know, another chocolate cake… but don’t worry, you can make it vanilla by removing the cocoa powder, adding in self-raising flour instead, and vanilla! Everything else stays the same.
I wanted to make a 6″ cake for this, because I found the look of the cake is better as a 6″ cake – the smaller size makes the cake look taller and suits the style. I always use these 6″ tins because I find them best.
I use either a baking spread or room temperature butter, light brown soft sugar, eggs, self raising flour, cocoa powder and a smidge of vanilla makes the most delicious sponge.

Buttercream
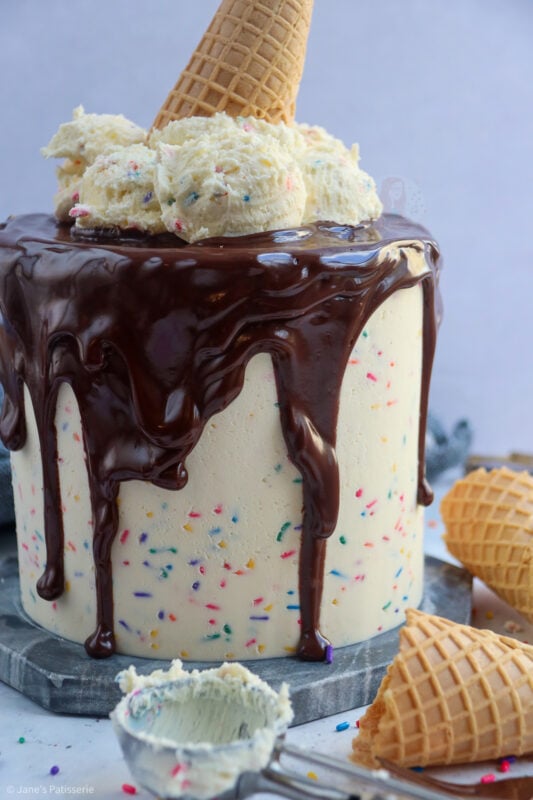
So because I wanted this cake to look like a melted ice cream, I wanted a colour that suits the idea of ice cream… you can basically use any colour that you fancy, but I decided vanilla would contrast really well with a drip, and then the flavour will contrast well as well.
Room temperature unsalted block butter is best for this – especially if you are baking in the summer. A rule for me is to NEVER use a spread or margarine for buttercream as it just DOES NOT WORK. You want to use block butter so it firms up really nice once made.
I used vanilla extract to flavour, as well as the icing sugar. An equal 1:2 ratio of butter to icing sugar is what I always live by – and it worked perfectly. However, I wanted colour… so I decided to add some sprinkles last minute…
Sprinkles
Oh yes, I know… FUNFETTI SPRINKLES! Oh yes, I thought why not add some sprinkles to the cake because I personally douse my ice creams in sprinkles, especially when you go to an ice cream kiosk in the middle of summer by the seaside… so why not on a melted ice cream cake like this?!
At first I did wonder if it would even work because adding texture to a buttercream and then trying to smooth it around can sometimes cause a bit of an issue, but it works with the biscuit crumbs in my Oreo drip cake!
You don’t need to add tonnes of Funfetti Sprinkles but it’s worth adding enough to actually get the look you are after – so I found 100g of sprinkles perfect. I do use these BEAUTIFUL sprinkles that are legal and bake stable in the uk as well.
If you aren’t sure what that means; some sprinkles (such as American sprinkles) are often illegal in the uk because of the additives that they use, whereas lots of sprinkles in the UK are such poor quality they dissolve or turn green when baked with.
Assembly
When it comes to a cake like this, it’s basically all about assembling of the cake and getting it bang on. I find using the correct tools such as small angled spatulas, turntables, large metal scrapers and so on.
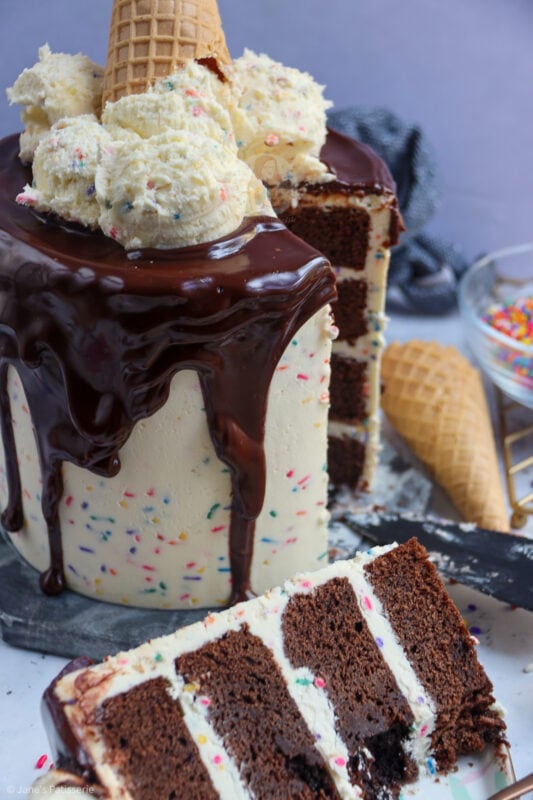
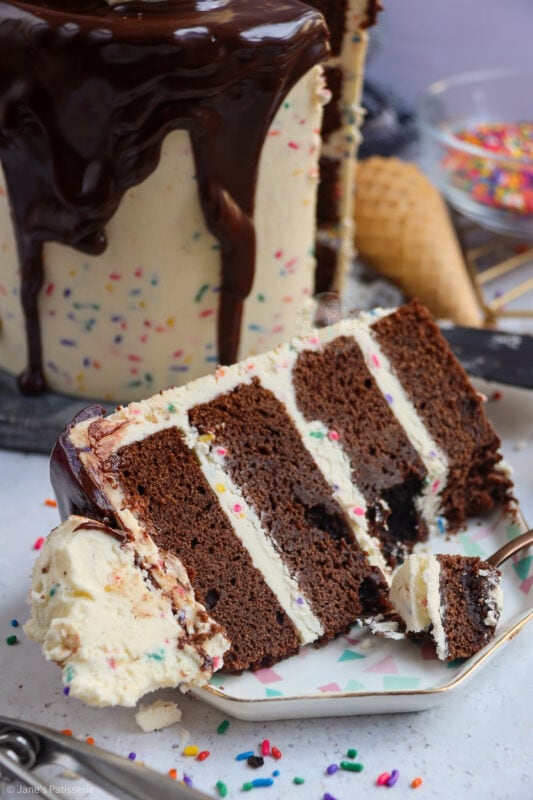
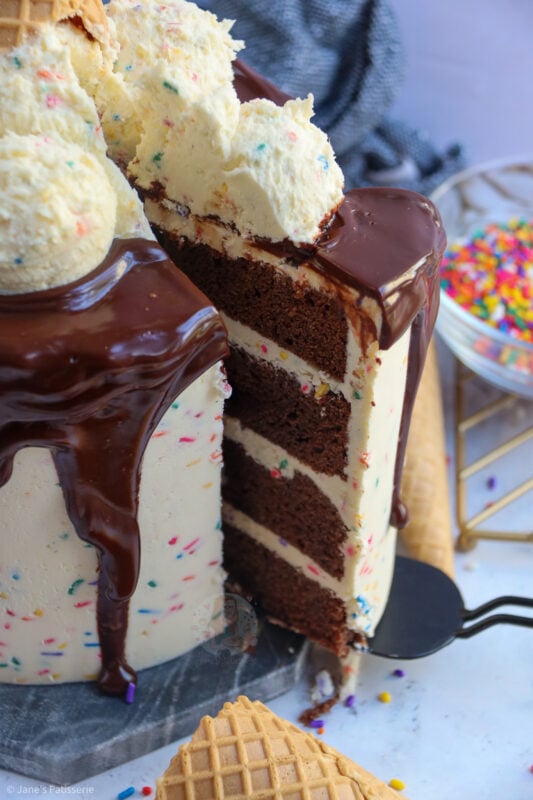
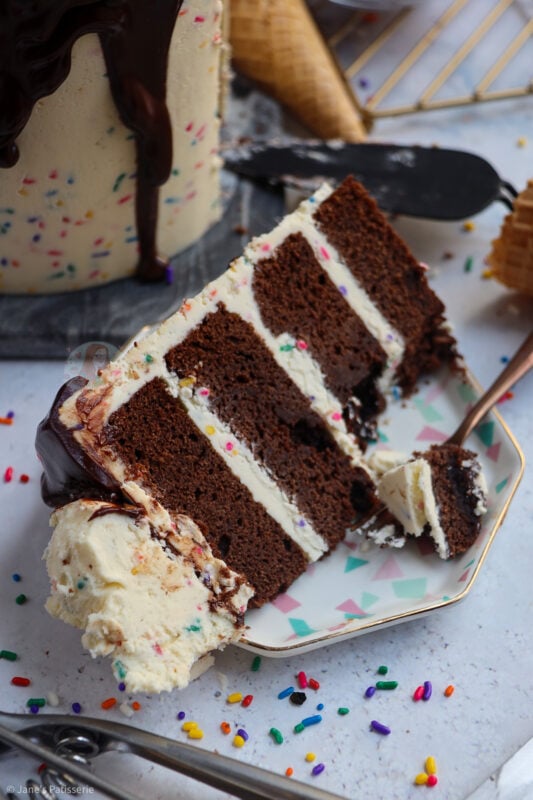
Because these cakes are baked into two deeper layers, I find splitting each one into two layers (to make four total) creates the perfect cake. Using something such as a cake leveller makes it even and flat. I don’t find I need to take off the top of the sponges as because they are baked at a lower temperature they are automatically flatter.
Layer your first sponge onto your chosen (flat) board or plate, add some buttercream, smooth over and layer. I create a crumb coat with a really small amount of buttercream to seal in any crumbs, and chill the cake. I then add on extra buttercream and smooth over again. To get a really smooth finish, heating your large metal scrapers under the hot tap can create a beautiful look.
The leftover buttercream is left for the ice cream affect at the end.

Drip
For the drip I decided to use one of my normal recipes; the same drip I now use pretty much all the time from my chocolate drip cake. The mix of dark chocolate, milk chocolate and double cream creates the perfect texture for a drip and I am obsessed as always.
I usually use small piping bags to make a drip like on my other drip cakes, but as this cake was meant to have the ‘melted’ element to it, I decided to basically pour the ganache on top and let it drip itself… and I love it!!

Tips and Tricks
It’s always best to chill every single stage of a cake like this. A cold cake is so much easier to decorate compared to something that is too soft!
For this recipe I use
- These Funfetti sprinkles
- These cake tins
- This cake scraper
- This dark chocolate
- This milk chocolate
- This cocoa powder
- This turntable
- These angled spatulas


Melted Ice Cream Cake!
A four-layer chocolate cake with vanilla funfetti frosting and all of the chocolate drip for an amazing melted ice cream cake!
Print
Pin
Rate
Servings: 12 slices
Ingredients
Cakes
- 325 g unsalted butter (room temp)
- 325 g light brown soft sugar
- 265 g self-raising flour
- 60 g cocoa powder
- 6 medium eggs
- 1 tsp vanilla extract
Buttercream
- 500 g unsalted butter (room temp)
- 1000 g icing sugar
- 2 tsp vanilla extract
- 100 g Funfetti Sprinkles
Decoration
- 50 g dark chocolate
- 50 g milk chocolate
- 100 ml double cream
- ice cream cone
Instructions
Cakes
- Preheat your oven to 170ºc/150ºfan, and line two 6" deep cake tins with parchment paper.
- Add the unsalted butter and light brown sugar to a bowl, and beat until light and fluffy.
- Add in the self raising flour, eggs, cocoa powder and vanilla extract and beat again until a lovely smooth cake mixture is formed.
- Split evenly between the two tins and bake in the oven for 35-45 minutes (or until a skewer comes out clean!)
- Once baked, leave to cool in the tin for 10 minutes, and then leave to cool fully on a wire rack.
Buttercream
- Beat the unsalted butter on its own for a while in your mixer until its smooth and supple.
- Add in the icing sugar a little at a time and beat fully until its light and fluffy.
- Add the vanilla extract and beat again until smooth.
- Finally, add in the sprinkles and mix.
Decoration
- Level the cakes off if necessary. Split the two cakes into two so you have four layers in total
- Add your first cake to a cake board or flat serving plate and secure with a small amount of buttercream.
- Spread some buttercream onto the first layer and add the second sponge. Repeat until you reach the top layer of cake.
- Spread a small amount of buttercream around the sides to fill in the gaps and create a crumb coat. Refrigerate the cake for at least 30 minutes.
- Once refrigerated add on more buttercream using an angled spatula, slather over and then smooth around using a large metal scraper.
- Refrigerate the cake for another 30 minutes.
- Add the the dark chocolate, milk chocolate and double cream to a jug and melt until smooth.
- Using a spoon, piping bag or jug, drip this down the sides of the cake. Set the cake in the fridge for another 30 minutes.
- Using an ice cream scoop, dollop the leftover buttercream onto the cake in ice cream sized lumps, and then top with an ice cream cone.
Notes
- For this recipe I used:
- This cake will last for 3+ days
- If you want a vanilla sponge, look at this recipe
- If you want to make an 8" version, look at this recipe
Find my other recipes on my Recipes Page!
You can find me on:
Instagram
Facebook
Pinterest
Twitter
Youtube
J x
© Jane’s Patisserie. All images & content are copyright protected. Do not use my images without prior permission. If you want to republish this recipe, please re-write the recipe in your own words and credit me, or link back to this post for the recipe.
This is my go to celebration cake I made it for my dads 80th birthday and my kids birthday, my brother wants a cake for his 25th wedding anniversary and wanted to make this two tier in a 10” and 8” but don’t know how to convert the recipe. Can you help xx
Hiya,
I made this for my daughter’s birthday… it looked incredible but the cake was rather dense and dry 😔 best tasting buttercream though
This could mean it was slightly overbaked, or if you stored it in the fridge this will also have caused a problem x
Hi Jane
I’m hoping to make this as a half and half cake with one sponge vanilla and the other one chocolate
for my daughters birthday next month but only have 3 inch deep tins. Do you think they’ll be deep enough? Thank you