Jane's Patisserie » Recipes » Best Baking Recipes » Gingerbread Cookie Wreath!
Gingerbread Cookie Wreath!

*This post may contain affiliate links. Please see my disclosure for more details!*
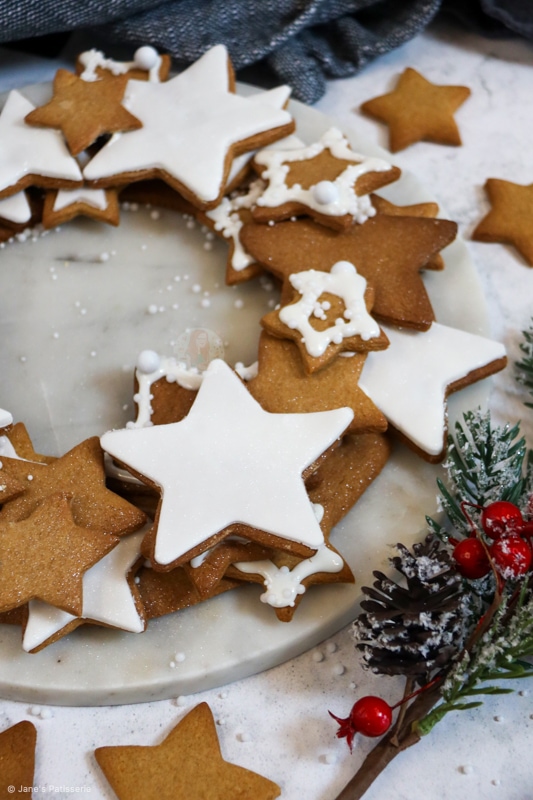
A deliciously easy gingerbread cookie wreath with homemade gingerbread biscuits, royal icing and more to create a beautiful showstopper!

So we all know I am obsessed with anything gingerbread themed right?! Honestly, I just can’t stop. I am in love with it all.
The spiced biscuit flavour just levels everything up and I just want to post more and more gingerbread themed bakes for you all to enjoy along with me… so… here is my gingerbread cookie wreath!

Gingerbread biscuits
My gingerbread biscuit recipe has been on my blog for many years now, and it’s always been a cult classic throughout the festive period. It’s a ‘cosy’ biscuit, and it works. It’s a biscuit that I don’t chill which makes it far easier, but also, it’s super easy to make.
I have used the base recipe on many bakes, but as again it works so well, I didn’t want to change it. I find it super easy to rub the dry ingredients together, and then add in the wet ingredients.
The plain flour, bicarb, ground ginger, light brown sugar create the dry base, and you rub the cold and cubed butter into them to create a breadcrumb like texture. You then add in the golden syrup and egg, and either beat with a beater or fold together with a spatula and bring it together with your hands.


Spices
For this cookie recipe, I do just use ground ginger. Some other gingerbread themed bakes of my such as my gingerbread NYC Cookies, or my gingerbread blondies use a mix of spices – and of course, you can in these as well.
If you find the flavour too subtle, add more. If you find it too strong, use less – it’s all about finding the balance of spices that suit to your taste.


Cookie Cutters
For this recipe, I went for a star shaped theme. There is no particular reasoning to this, other than I thought it would really well for the festive Christmas theme. You can use any shape you want though, or even use a mix to jazz it up a little.
I decided to use a variety of sizes for the biscuits to give the cookie wreath a bit of depth – but again that’s up to you. The cookie cutters work perfectly for the biscuit, and then also the roll out icing if you use it for decoration like I did.


Baking
When it comes to the baking times, it does vary a smidge. I used two large bowls to cut out the base biscuit which is a large round ring. This is the base to stick the other biscuits to, and creates a sturdy layer. This biscuit requires the most baking, of course.
The stars, which I used three different sizes, then vary to slightly less timing. The baking times I used were:
- Round circle – 15+ minutes
- Large stars – 11-12 minutes
- Smaller stars – 8-9 minutes
The best way to see if they are done though is you are looking for a firmer touch than a raw dough, but not completely solid as they continue to bake whilst cooling slightly.


Decorating
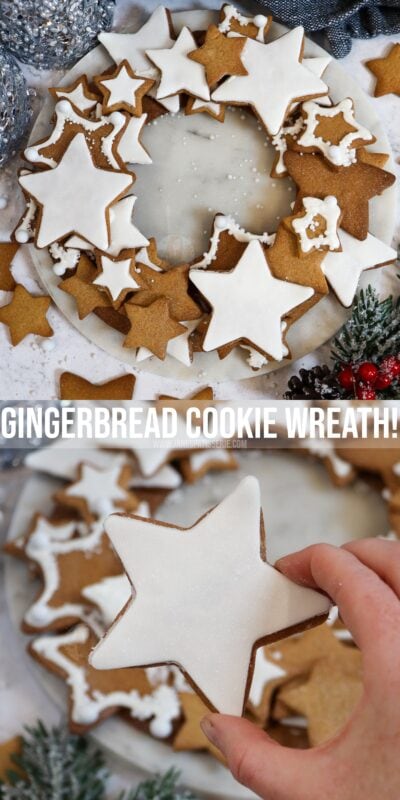
For the decoration it is a bit of fun – and it’s meant to be. The cookies don’t have to be perfectly shaped, and that’s what I love. You can layer and layer the decorated biscuits to create the wreath, and enjoy it.
For most of the biscuits, I used royal icing to pipe around the edge of the biscuits, and for the others I used roll out white icing to decorate. Some were plain, but again – this also works.
The royal icing acts as the glue for the biscuits, so you pipe some onto the base, and touching areas of biscuits as you stack and create the wreath. I used water to stick the roll out icing to the gingerbread cookies and it worked wonderfully.
I used a little bit of edible glitter spray to jazz up the biscuits slightly once the wreath was made, and added on some cute sprinkles.


Tips & Tricks
I used a 10″ cake tin to cut out the large circle, and a 6″ circle to mark out the middle. You can use and re-roll the dough as you go to use up the biscuit dough. Try not to warm it too much, so keep your hands as cold as possible.
I don’t chill my gingerbread dough, but it can go in the fridge in the meantime as you are waiting for other biscuits to bake.
Gingerbread biscuits last for 2-3+ weeks at room temp – the decorated biscuits will last for 1-2+ weeks. They also freeze well for 3+ months.
I used these cookie cutters.

Gingerbread Cookie Wreath!
A deliciously easy gingerbread cookie wreath with homemade gingerbread biscuits, royal icing and more to create a beautiful showstopper!
Print
Pin
Rate
Servings: 12 people
Ingredients
Gingerbread cookie dough
- 375 g plain flour
- 1 tsp bicarbonate of soda
- 3 tsps ground ginger
- 175 g light brown soft sugar
- 120 g unsalted butter (cold and cubed)
- 5 tbsps golden syrup
- 1 medium egg
Decoration
- 200 g royal icing
- 200 g ready to roll white icing
- glitter/sprinkles
Instructions
- Preheat the oven to 180ºc/160ºfan and line 3-4 large trays with parchment paper.
- Add the plain flour, bicarb, ground ginger, light brown soft sugar and unsalted butter to a large bowl
- Rub the ingredients together with your fingertips to make a breadcrumb texture
- Add the golden syrup and egg and mix together with a spatula/your hands until the dough comes together.
- Knead slightly in the bowl to bring it together and make a smooth dough
- Dust the work surface with plain flour and roll out the dough to 0.5cm thickness
- Cut out a 10" circle, and then cut a 6" circle out of the middle. I used cake tins to do this.
- Place this onto one tray and then re-roll the biscuit dough, and then cut out the stars.
- I used 10cm, 7cm and 4cm star cutters to cut out a variety of stars. Place onto baking trays with the same size star (for baking times).
- Bake the cookies in the oven - the big circle takes 15-18 minutes, the larger stars take 11-12 minutes, and the smaller stars take 8-9 minutes.
- Once baked, leave to cool fully.
To Decorate
- Pipe royal icing onto most of the biscuits however you please, I did it around the edge.
- Roll out the ready to roll icing and cut out stars of icing - use water to stick the icing to the biscuits.
- Once the stars are ready, layer the stars randomly onto the base circle, using royal icing as glue, and repeat until you have a pretty wreath,
- Decorate with sprinkles and edible glitter if you fancy.
Notes
- I used a 10" cake tin to cut out the large circle, and a 6" circle to mark out the middle. I used these star cutters for the stars.
- I don't chill my gingerbread dough, but it can go in the fridge in the meantime as you are waiting for other biscuits to bake.
- Gingerbread biscuits last for 2-3+ weeks at room temp - the decorated biscuits will last for 1-2+ weeks. They also freeze well for 3+ months.
- I used ready made royal icing sugar that you just add water to, and ready to roll white icing for ease.
Find my other recipes on my Recipes Page!
You can find me on:
Instagram
Facebook
Pinterest
Twitter
Youtube
J x
© Jane’s Patisserie. All images & content are copyright protected. Do not use my images without prior permission. If you want to republish this recipe, please re-write the recipe in your own words and credit me, or link back to this post for the recipe.
Jane, how do I stop my cookies from spreading out?
Can the precooked dough be frozen please? Thanks
Hiya! Yes this should be fine! Hope this helps x
Are these a softer gingerbread cookie or a hard one?
Hiya! These are the perfect balance of both – but bake a tad longer if you want more crunch! Hope this helps! x
Could I use this for a gingerbread house
Yes absolutely you can! Enjoy! x
Thank you for Bev this is the very question I was scrolling down to ask. No need to wait for a reply now 😆
Can I use a 10 inch springform tin