
Jane's Patisserie » Recipes » Best Baking Recipes » Lemon and Raspberry Cake!
Lemon and Raspberry Cake!

*This post may contain affiliate links. Please see my disclosure for more details!*
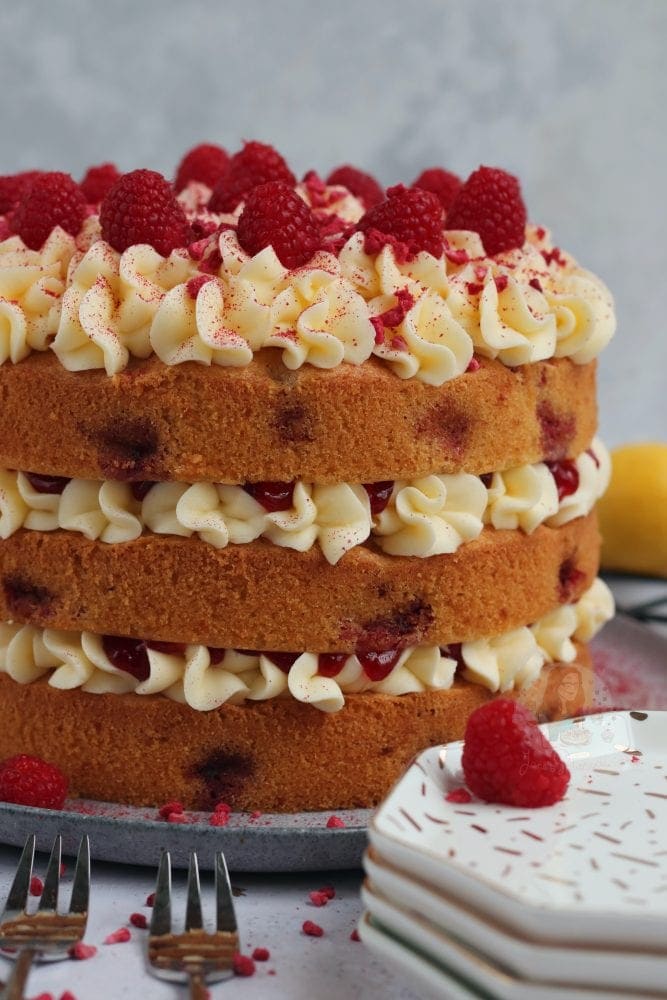
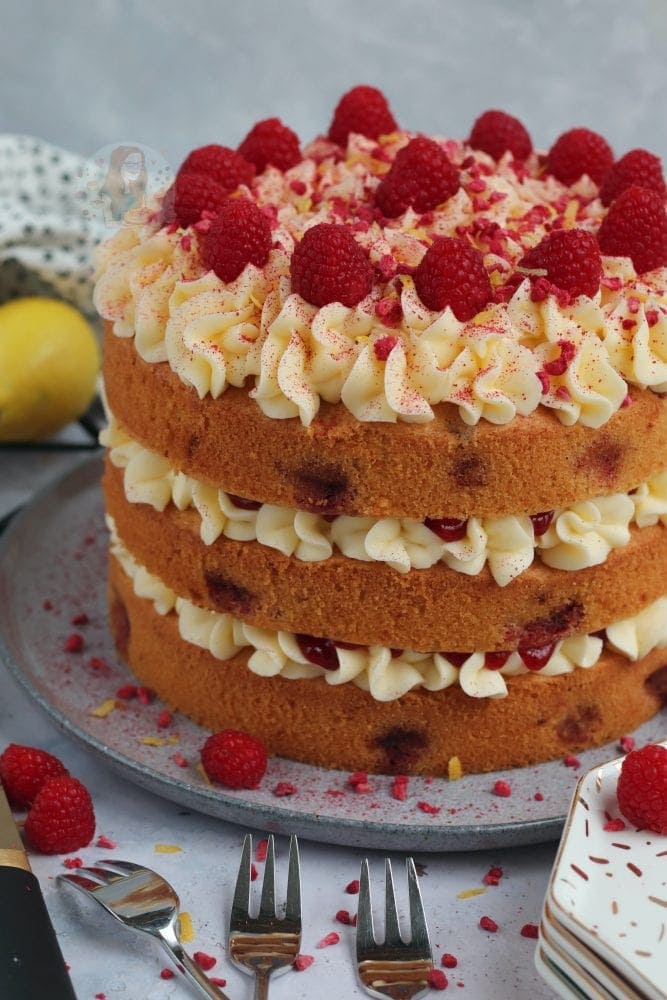
A three-layer lemon and raspberry cake with a lemon and raspberry sponge, lemon buttercream frosting and more!
Lemon and Raspberry Cake: Quick Overview
Here is the quick version for you guys before we get properly stuck in, everything you need to know at a glance!
- Layers: Three light, fruity 8″/20cm sponges, and yes, there is an easy two-layer version in the notes if you want something smaller!
- Tins: Three 8 inch / 20cm round tins.
- Frosting: Silky lemon buttercream, pipe it or slather it, totally your call.
- Filling: Raspberry jam in the middle, or swap in lemon curd, or honestly a little of both.
- Decoration: Fresh raspberries and freeze dried raspberries, my absolute favourite.
- Total time: About 1 hour 30 minutes start to finish.
The best bit? This is a proper three-layer showstopper, but it converts straight down to two layers with the notes below. One recipe, however fancy you are feeling that day!

Lemon and raspberry bakes
Can we start this blog post off by appreciating how light and delicious a flavour this cake sounds. Lemon and Raspberry together is sweet, tangy and fruity – and it’s hard to beat. I love a lemon cake, I love a raspberry bake.. combine them? Heaven.
White chocolate and raspberry together is also an epic combination. But I know that not all of you like to bake using chocolate, and lemon and raspberry together is just as good. Honestly, I can never get over how light and fruity it is!
My Lemon & Raspberry Cheesecake was my main inspiration for this bake – as I just adore it. It almost feels healthier as it’s got two types of fruit in – but don’t kid yourself.. it’s still a cake full of all the sugary goodness.
Lemon and raspberry cake
I decided originally for this one to do a two layer cake as some of you have requested some more two layers, but genuinely completely forgot until I had baked my first three layer version. I fell in love with the three layer version and it stuck… It’s a sponge that you can easily adapt into more layers if you wanted, or create only two layers – it’s definitely adaptable and that’s the good bit. You can find the notes below on a two layer version!
My lemon & raspberry cupcakes are so moist and light, that this cake version is such a showstopping cake version of the cupcakes you will adore it, but you can obviously have a go at the cupcakes if you wish instead.

Sponge
Quick pantry check before you start. Have a glance and make sure you have got:
- 400g butter, 400g caster sugar, 400g self raising flour
- 8 medium eggs (weighed in their shells to about 400g, more on that below)
- Zest of 2 lemons
- 300g raspberries (fresh is best, but frozen works too)
This sponge is light, it’s easy to mix together and I utterly adore it. It’s a standard cake mixture of butter and sugar beaten together until light and fluffy, and then you mix in the eggs and flour. I mix in the lemon zest, and then fold through the raspberries and split that between the cake tins.
- Butter – I use either a room temperature block butter or baking spread for a cake sponge
- Sugar – I use caster sugar in this cake, but golden caster sugar would work well as well
- Flour – self raising flour as always. However, if you don’t have it, you can make your own with 2 level tsps per 150g of plain flour, mixed in before using and removing any other raising agent in the recipe.
- Eggs – 7-8 medium eggs, but weigh in the shells and try and get as close to 400g as possible and match the butter, sugar and flour to this weight
- Lemon – I use the zest of lemons, but as mentioned above you can use lemon extract
- Raspberries – I use fresh raspberries because they’re the best
Fresh or frozen raspberries?
I use fresh because they hold their shape and taste SO good, but frozen work absolutely fine, do not worry. Fold them in straight from the freezer without defrosting so they bleed less into the sponge, and just know the bake may want a few extra minutes in the oven because of that little bit of extra moisture.
And a word on those eggs, because it is my favourite reliability trick: weighing them in their shells and matching the butter, sugar and flour to that weight is exactly why this sponge comes out perfect every single time. No guesswork, no sunken middles, honestly it is the one thing I would never skip!

Buttercream
First things first, this is a proper lemon buttercream, light, zingy and so easy to whip up!
For the buttercream I was originally just got to do a lemon and raspberry frosting to make it easier, but I decided to make a lemon one because adding in the raspberries just wasn’t my vibe that day. However, you can easily add some in and slather the buttercream on
If you mix it too much, you will just get a pink frosting – but that’s not necessarily a bad thing! I find if I make the frosting mostly by the mixer, and then swirl the raspberries in by hand it works the best. However, just lemon is easy
I piped my buttercream on as you can see, but it really doesn’t matter – you can slather, you can pipe, you can dollop, you can whatever you actually fancy. I find the freeze dried raspberries give a beautiful colour on the top anyway and would easily cover any mistakes
If it plays up on you, do not panic, here is how to sort it:
- Too soft or runny? Add more icing sugar a spoonful at a time until it holds its shape.
- Gone a bit stiff? A tiny splash of milk or lemon juice loosens it right back up.
- Want that pretty pale look rather than full pink? Beat the butter really pale first, and if you are adding raspberries, swirl them through by hand at the very end for a lovely marbled effect instead of mixing them fully in.

The filling & decoration
I did decided to add a little raspberry jam into the middle, but the good thing about this bake is that you can easily use lemon curd in the middle instead if you wished. I would have used a little of both, but I didn’t have any lemon curd in at the time of baking; both work really well.
For the decoration I just went down the usual route of fresh raspberries, and freeze dried raspberries. I know, I know… I am obsessed with them. I can’t help it – they just look so beautiful on a bake, and when you ‘bulk’ buy them like I do, they’re much cheaper in the long run!
I used these large piping bags as I find them strong, easy to control when piping, and I used this beautiful 2d closed star piping tip for the decoration as I adore it’s look.
Think of the filling as a choose-your-own moment, not a backup plan. Take your pick:
- Raspberry jam for a classic, fruity middle.
- Lemon curd for extra zesty zing.
- A little of both if you are feeling fancy, they are lovely together.
One little assembly trick to save your sides: pipe a ring of buttercream around the edge of each sponge first to make a dam, then spoon your jam or curd inside that ring. It stops the filling squeezing out when you stack the layers, and keeps everything looking neat!

Tips & Tricks
Here is everything grouped together so nothing gets lost, sorted into what you need, what you can do ahead, and how to keep it.
Equipment
- I use these cake tins for this bake
- I use this piping tip for the decoration
- I use these piping bags for buttercream
- I use these freeze dried raspberries in my baking
Make ahead:
- You can bake the sponges a day ahead, just wrap them well once fully cool so they stay lovely and moist.
- The buttercream can be made ahead too, give it a good re-beat before you use it to bring it back to smooth.
Storage
- This cake will last for 3+ days at room temperature, and it will freeze for 3+ months, so you are covered either way! (Full storage and serving detail is just below.)


Lemon and Raspberry Cake Recipe
A three-layer lemon and raspberry cake with a lemon and raspberry sponge, lemon buttercream frosting and more!
Print
Pin
Rate
Servings: 18 Slices
Ingredients
Cake
- 400 g unsalted butter
- 400 g caster sugar
- 400 g self raising flour
- 8 medium eggs
- Zest of 2 lemons
- 300 g raspberries
Buttercream
- 350 g unsalted butter (room temp)
- 700 g icing sugar
- Juice of 2 lemons
Extras
- Raspberry jam
- Fresh raspberries
- Freeze dried raspberries
- Lemon zest
- Sprinkles
Instructions
Cakes
- Preheat your oven to 180C/160C Fan and line three 8"/20cm tins with parchment paper, and leave to the side.
- Beat together your butter and sugar for 3-4 minutes until light and fluffy!
- Add in your self raising flour, eggs and lemon zest and beat again for a couple of minutes until smooth
- Try not to over beat – mix until it comes together and is smooth.
- Add in your raspberries and fold through – Split the cake mix between the three tins.
- Once in the tins, bake in the oven for 30-35 minutes, or until baked through. I check my cake is baked by using a skewer, and listening carefully to see if it bubbles! Because of the fruit, this can often take a bit longer!
- Once baked, leave to cool in the tin for 10 minutes, and then transfer to a wire rack to finish cooling.
Buttercream
- To make the buttercream, make sure your butter is at room temperature.
- Beat the butter on its own for 3-4 minutes, I use the paddle attachment.
- Once the butter is nice and supple, add the icing Sugar in 1/2 at a time, and beat fully before adding any more in.
- Add in the lemon, and beat again for 3-4 minutes until it's all come together.
Decoration
- Get your first cake onto your chosen plate and spread/pipe over a third of the buttercream.
- Add on a few tablespoons of jam and spread.
- Add on your second cake and spread/pipe the second third of the buttercream on top.
- Finally add on your third sponge and pipe the rest of the buttercream on!
- Decorate with fresh raspberries, freeze dried raspberries, lemon zest and so on! Enjoy!
Notes
- Two-layer version. Use 250g butter/sugar/flour and 5 medium eggs with the zest of 1 lemon and 150g raspberries. Use 200g butter/400g icing sugar for the buttercream with the juice of 1 lemon. Bake into two 8″ tins for 30 minutes!
- Storage & serving. This cake keeps for 3 days at room temperature in a cake box. You can pop it in the fridge if you prefer, but let it sit out and come back to room temperature before serving so the sponge is soft and the buttercream is creamy.
- I recommend using this beautiful piping tip!
- I also recommend buying these freeze dried raspberries as they’re the best!
How to Store and Serve
Good news, this is a properly low-fuss cake to keep! It sits happily for 3+ days at room temperature in a cake box, no need to overthink it, that simplicity is exactly why I love baking it. If your kitchen runs warm you can keep it in the fridge instead, just remember to bring it back to room temp before serving so the sponge stays soft and the buttercream turns lovely and creamy again.
To freeze, wrap the sponges (iced or un-iced) well and they will keep for 3+ months. Defrost fully at room temperature before serving. Whichever way you store it, a slice at room temperature is always the dreamiest, ENJOY!
Variations
This bake is so adaptable, here are a few easy ways to make it your own using everything already in the recipe:
- Two-layer cake: Scale down to two sponges using the quantities in the recipe notes, perfect for a smaller crowd.
- Swap the filling: Lemon curd instead of raspberry jam for extra zing, or a little of both.
- Raspberry buttercream: Swirl a few raspberries into the lemon buttercream by hand for a pretty marbled, pink finish.
- Extra berries on top: Pile on more fresh and freeze dried raspberries for a real showstopper.
Hi Jane, I can’t wait to try this recipe. I have a question / need advice, my daughter is allergic to eggs – could I use egg replacer or an alternative for this? Thank you so much!
I don’t often use egg replacer as I personally rather make a vegan sponge – but if you have done before and it works then go for it! X
Looking forward to making this cake for some friends. What is the best type of cake tin to use? I have some deep ones and some sandwich tins. All of them are loose bottomed ones. Thanks!
Ps I’ve been zoom-baking with my niece through lockdown and your recipes have been our faves!
I would use the deeper ones – I tend to find some sandwich tins are way too shallow!! xx
Made this cake once before and making it again but wondered if the buttercream could.be made in advance and best way to store after
It can, but it would need re-beating again to make it pipeable/it’s best. Buttercream lasts 2 weeks in the fridge!
Hello jane,
Il be baking this cake soon, I was wondering could I use golden caster sugar for the cake same measurements? Only because I have it already. Or shall I just buy normal caster?
Thank youu
Ahh yeah just switch to the golden!! x
Hi Jane, looking to try this. If using frozen raspberries have you noticed a difference?
Thanks
Sometimes it can take a smidge longer to bake, but otherwise it’s fine!!
Hi there,
I made this cake today but the sides haven’t browned like yours, only the tops. I don’t suppose you have any idea why this might be?
That could be your oven? As long as it tastes nice it shouldn’t matter! x
What piping technique did you use with the 2D tip for this cake?
Just pipe downwards and lift off each time and you get the flowery/star style!
Hi Jane, I’m excited to make this cake For my dads 60th and wondered what piping technique you used please?
Hi Jane! I love all of your recipes so much. If I was to make this a two layer with 6 inch deep tins what measurement shall I use? I want to make them deep so I can cut into 4 cakes to buttercream over it! Thanks so much!!
I would use 2/3 of the recipe roughly, and then bake and split! x
Hey Jane -What would happen if I used this recipe but using three smaller cake tins e.g. 6inch or 7inch cake tins? Could I still use the same quantities as your recipe and just have taller cakes?
sorry realised I only have three 6 inch cake tins – so same question as above but for 6 inch tins only?
So 6″ tins are about 2/3 of the size – so it could be too much cake mix for three tins. I would maybe reduce the recipe slightly and bake into the 3 6″ tins!
Hi Jane – thank you for the recipe. I want to try this recipe with an ombre icing. Would I be able to make this cake by applying the icing all the way round i.e. apply a crumb coat, then another layer of icing using 2 different food colours? Want to achieve a look similar to your mini egg cake (without the chocolate ganache drip)
Hey! Yes definitely – I would just follow the mini egg drip cake guidance but colour to what you want on this cake x
I made this cake for my bosses leaving party. It was a huge hit! Everybody loved it, and it was so easy to make. My son then made it for his girlfriends 30th birthday, and again it was a big hit. It just looks so impressive and nobody could believe I’d actually made it. 🙂