Jane's Patisserie » Recipes » Best Baking Recipes » Neapolitan Cake!
Neapolitan Cake!

*This post may contain affiliate links. Please see my disclosure for more details!*
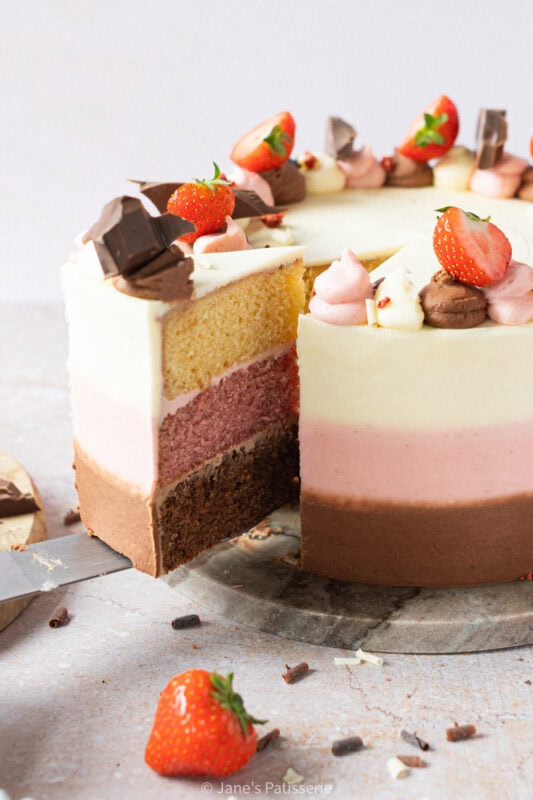
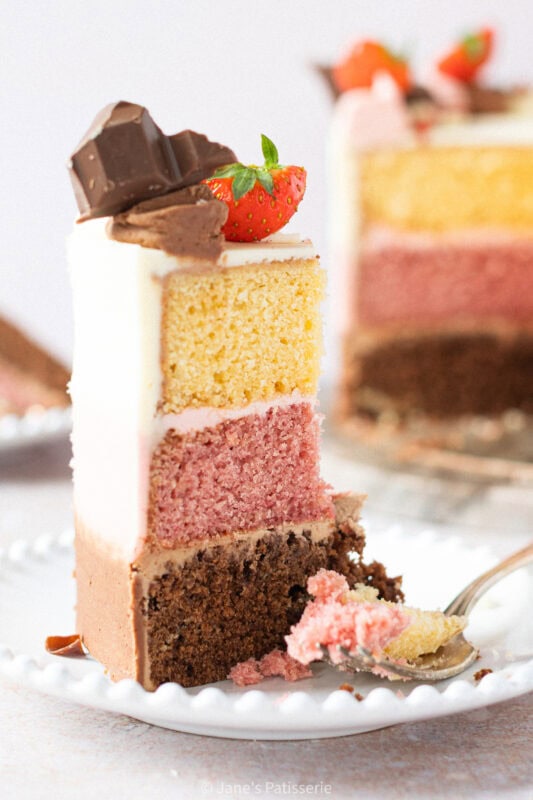
Chocolate cake, strawberry cake, and vanilla cake with all the trimmings… perfect Neapolitan cake!
Neapolitan cake!
So… the Neapolitan theme is definitely one of my favourites. If you aren’t aware of it, its basically an ice-cream from my childhood that I remember it best by, with chocolate, strawberry and vanilla all in one. It’s SO good, but everyone I knew I always had a favourite flavour. Mine was chocolate, obviously.
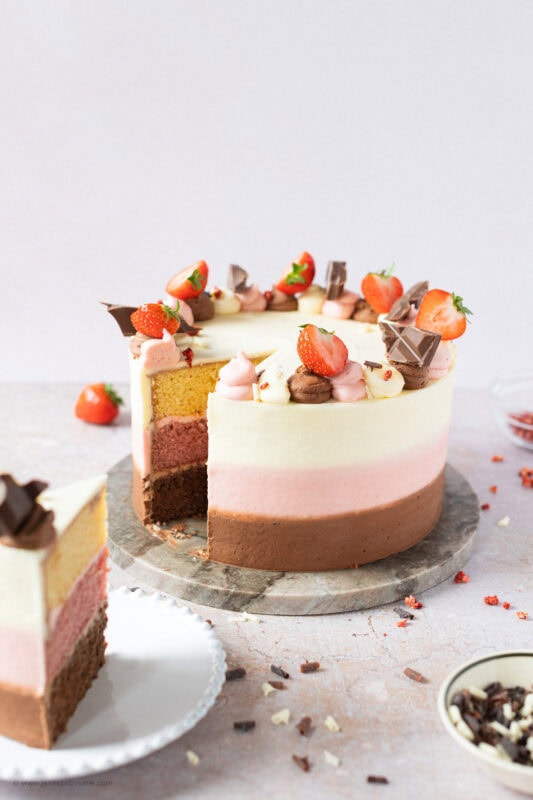
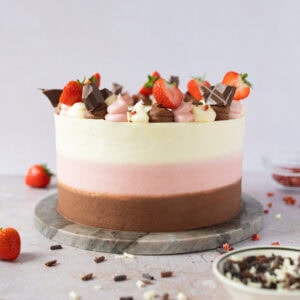
I’ve posted a couple of Neapolitan recipes before with my Neapolitan cheesecake and my Neapolitan cupcakes for example, so I thought it was about time I did another one, and I thought a full layer cake was the best route to go. You can see from the images that its a showstopper of a cake, and has a layer that everyone will love most.
Sponges
The cake sponges are basically just a Victoria sponge type recipe that I have used in many a recipe such as my Oreo drip cake, or even Biscoff cake for example. A simple ratio recipe of the same weight of butter, sugar, flour and eggs and you have a dreamer of a cake.
You can obviously add various things in such as all of the flavours. For this particular beauty, I decided to used melted chocolate for the chocolate flavour, so that I didn’t have to add any more dry ingredients such as cocoa powder. If you add the cocoa powder into the third of the sponge, it will end up more madeira like, and the other two sponges will be a lot softer.
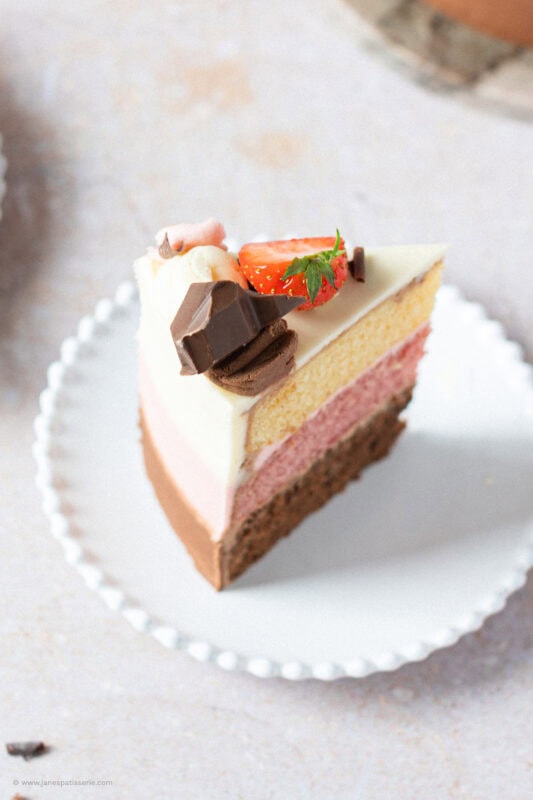
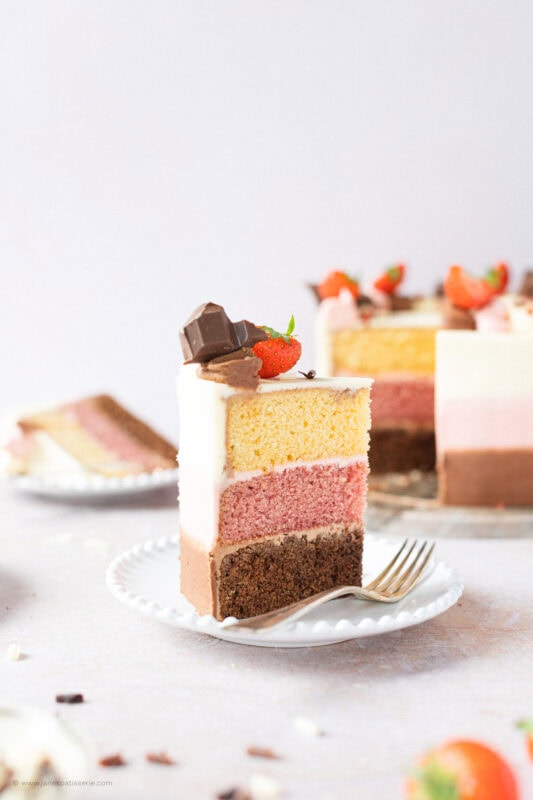
Dark chocolate is the best chocolate to use, and any supermarket own brand will do well! The strawberry layer is a bit different, where you can easily use strawberry flavouring if you prefer, or use the strawberry coulis. It’s quite easy to make your own strawberry coulis by using 300g of strawberries and 100g of caster sugar (recipe below).
The final layer is vanilla, so obviously that is quite simple. Add in a good quality vanilla extract, and you’ll have your final layer. The buttercream, flavours are flavoured in the same ways to make things easier. You don’t have to use the pink food colouring, but I think it makes it look properly Neapolitan themed. A good quality one is best, so I recommend pink food colouring!
Coulis
The strawberry coulis is actually much easier to make than people think. All you need to do is chop your strawberries, add them to a pan with sugar, and gently heat while mashing them down. The fruit softens, the sugar dissolves, and it turns into a glossy, fruity sauce.
Once everything is softened and slightly thickened, you simply pass it through a sieve into a bowl. This removes the seeds and any pulp, leaving you with a smooth, vibrant coulis. It’s worth that extra step for the texture alone. Let it cool fully before adding it to your sponge or buttercream. If it’s warm, it can loosen your mixture too much, and we want these layers to be sturdy enough to stack neatly.
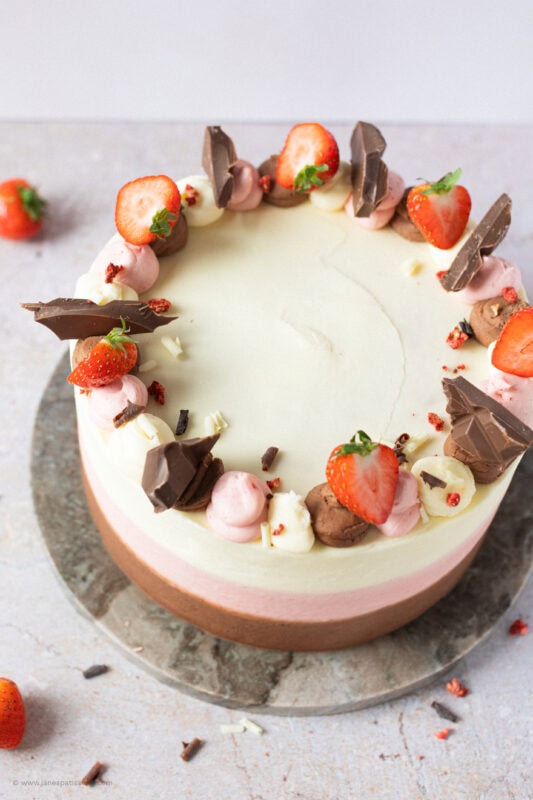
Decoration
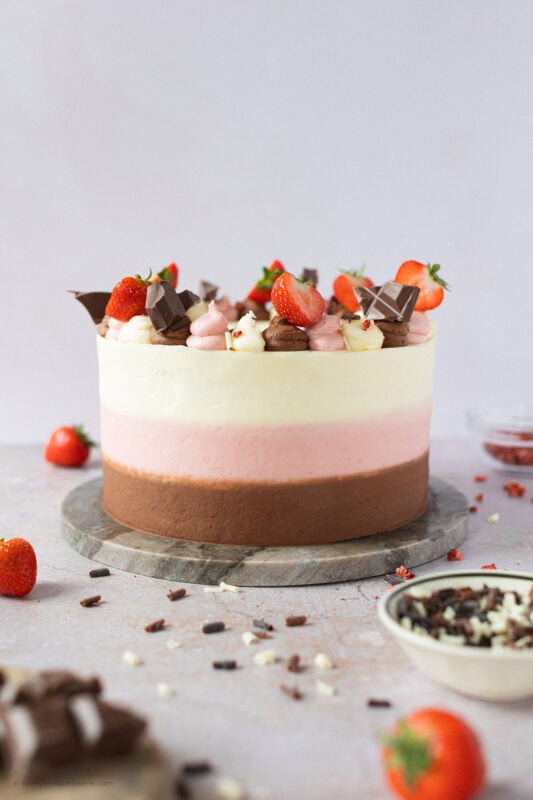
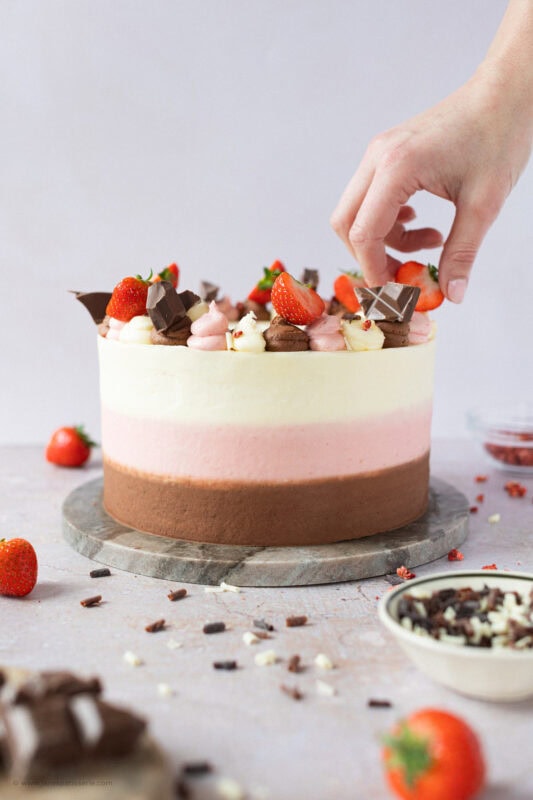
If you want those gorgeous, clean Neapolitan stripes around the outside of your cake, it’s honestly all about working in stages and keeping everything cold. Once your chocolate, strawberry and vanilla tiers are stacked and crumb coated, make sure the whole cake is properly chilled and firm before you even think about adding colour. A quick guide mark around the sides to divide the cake into three sections makes life so much easier and keeps everything looking even.
Pipe your chocolate buttercream around the bottom third, strawberry around the middle, and vanilla around the top, being nice and generous so you’ve got enough to scrape back. It will look messy at first, that’s completely normal but once you hold your scraper steady and spin the turntable, it all starts to come together. A chill between layers is the secret to preventing the colours from dragging into each other.
For really sharp lines, go in with a second thinner layer after chilling and scrape again with a perfectly clean edge. Take your time, clean your tools between passes, and don’t rush it. It’s one of those designs that’s more about patience than skill, but when it’s smooth and stripey all the way round, it looks SO effective.
Tips & tricks
- This recipe will last for 3 days once made
- I used pink food colouring to get a lovely pink colour, and some strawberry coulis. You can use any red berry coulis if you don’t want to make it yourself! It’s very important to use GOOD QUALITY food colouring, and not cheap supermarket stuff.
- I used dark chocolate because its a better flavour once baked in comparison to milk chocolate. It also gets the colour of the sponge to be darker and look more chocolate like.
- To create the perfect smooth iced finish you will need:
- Fully stacked and chilled three-tier cake (chocolate bottom, strawberry middle, vanilla top)
- Tall cake scraper (metal preferred)
- Offset spatula
- Piping bags (one per colour)
- Turntable
- Palette knife
- Plenty of fridge space
Neapolitan Cake Recipe
Chocolate cake, strawberry cake, and vanilla cake with all the trimmings... perfect Neapolitan cake
Print
Pin
Rate
Servings: 15 Slices
Ingredients
Cake Ingredients
- 400 g unsalted butter
- 400 g caster sugar
- 8 medium eggs
- 400 g self raising flour
- 100 g dark chocolate (melted)
- 50 g strawberry coulis (or any coulis)
- pink food colouring
- 1 tsp vanilla extract
Buttercream Ingredients
- 400 g unsalted butter (room temp)
- 800 g icing sugar
- 75 g melted chocolate
- 40 g strawberry coulis
- pink food colouring
- 2 tsp vanilla extract
Decoration
- fresh strawberries
- pieces of chocolate
Instructions
For the Cake
- Preheat your oven to 180ºc/160ºc fan, and line three 8"/20cm round cake tins with parchment paper. Leave to the side for now.
- In a bowl/stand mixer, add your butter and sugar, and beat until fluffy.
- Add in the eggs and flour, and beat again. Split the mixture into three bowls. It will be about 525g in each bowl to make sure its even.
- Add some cooled melted chocolate to one, and mix. Add the coulis and pink food colouring to the other, and mix. And add the vanilla to the final one and mix.
- Pour each mix into its own tin, and bake in the oven for 25-30 minutes, or until its baked. A skewer should come out clean!
For the Buttercream
- Beat the unsalted butter (please don't use anything else other than actual unsalted butter) in a bowl until its all smooth. Room temperature butter is best.
- Add in the icing sugar and beat again. If the butter was really supple and smooth before adding, this icing sugar should go in easily.
- Split the mixture between three bowls, and add the cooled melted chocolate to one, the coulis and pink food colouring to another, and the vanilla to the final and beat again until smooth
For the Decoration
- Put each buttercream into a bag. Do this in whatever order you like, but I did my chocolate layer, and then my chocolate buttercream, strawberry layer and then my strawberry buttercream, my vanilla layer, and then the vanilla buttercream on top
- With each layer, I smoothed out an even layer of each flavour.
- Apply a thin crumb coat in plain vanilla buttercream.
- Chill in the fridge for 30-45 minutes
- Apply Buttercream in Bands using a piping bag, enough for each layer (be careful to follow the line of each cake layer.
- Using a clean metal scraper, rotate the cake stand creating a clean buttercream finish with clear lines.
- In order pipe blobs of buttercream around the top edge of the cake (Chocolate, Strawberry, Vanilla)
- Decorate with fresh strawberries, pieces of chocolate, or anything you like!
Notes
- This recipe will last for 3 days once made
- I used pink food colouring to get a lovely pink colour, and some strawberry coulis. You can use any red berry coulis if you don't want to make it yourself! It's very important to use GOOD QUALITY food colouring, and not cheap supermarket stuff.
- I used dark chocolate because its a better flavour once baked in comparison to milk chocolate. It also gets the colour of the sponge to be darker and look more chocolate like.
- You can make a smaller version (two layer) if you like, but obviously you might have to make the sponges swirled in colour if there are only two. Use two thirds of the ingredients and:
- 300g unsalted butter
- 300g caster sugar
- 6 medium eggs
- 300g self raising flour
- 75g melted chocolate
- 40g coulis
- To create the perfect smooth iced finish you will need:
- Fully stacked and chilled three-tier cake (chocolate bottom, strawberry middle, vanilla top)
- Tall cake scraper (metal preferred)
- Offset spatula
- Piping bags (one per colour)
- Turntable
- Palette knife
- Plenty of fridge space
Another amazing recipe! Surprisingly easy to make too!
Good evening, I’m looking to bake this for my daughters 2nd birthday. What measurements would I need to make it a tray bake please?
Hi,
Made this for my daughter’s birthday, it was so tasty! Just one small thing, for the chocolate layer, I added the 100g melted dark chocolate to the sponge mix and it was quite dry to eat, any reason why you didn’t use cocoa powder in this recipe? Thanks.
This means the sponge was over baked! You can use cocoa powder if you want, but either recipe if over baked can create a dry sponge x
Hi Jane. If I wanted to cover the cake in the 3 different colours of buttercream to look like your triple chocolate cake. How much buttercream of each flavour would I need to do this please? X