Kinder Bueno Drip Cake!

*This post may contain affiliate links. Please see my disclosure for more details!*
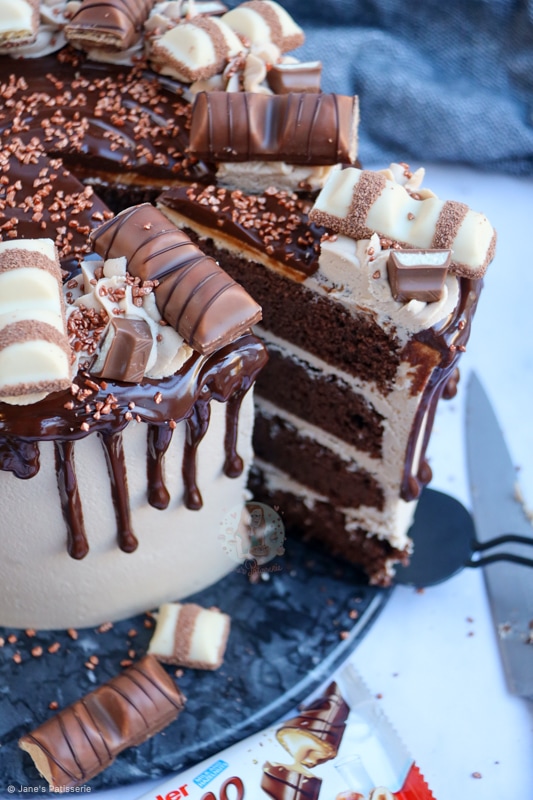
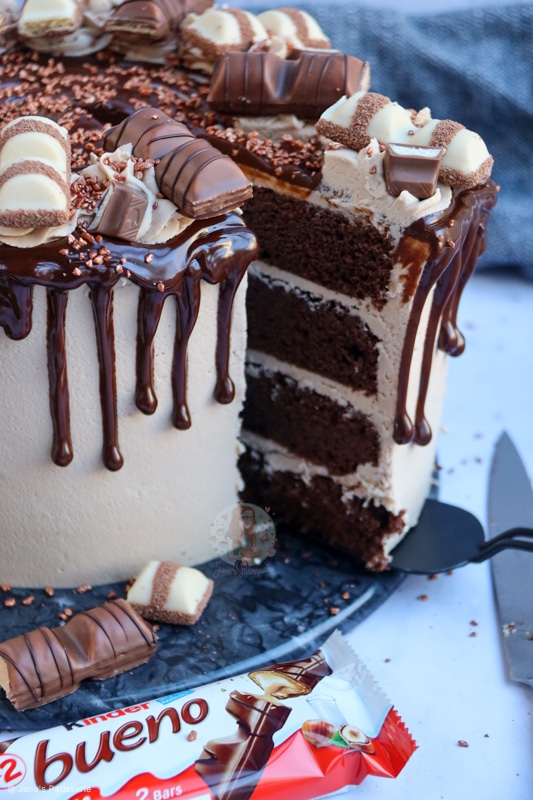
A four-layer Kinder Bueno drip cake with Kinder chocolate frosting, chocolate drip, and all the Kinder Bueno goodness!

Happy 4th birthday to my blog
So today is my blog’s FOURTH BIRTHDAY! THAT IS RIGHT! JANE’S PATISSERIE IS FOUR. The excitement is unreal. Like, I can’t cope. I thought I’d celebrate by posting a particularly sort after bake, this Kinder Bueno Drip Cake. Hello heaven.
But seriously, thank you SO incredibly much for the support over these four years, it has been mental. Yet again, this year is beating all the ones before.
I’ve managed to make this my full-time job, and it’s grown so much that I am now struggling to keep up with it all! In the year since my blog’s third birthday, I’ve peaked SEVEN MILLION VIEWS which is mind-blowing, and everything else has grown as well. Thank you thank you thank you! Anyway… back to the recipe…

The idea
This cake is probably one of the most highly requested things I have had in a long time. I realise, I tend to say this quite a lot about different recipes, but I do get a lot of requests for recipes daily.
Sometimes, I get requests for recipes that are actually already on my blog and some people just haven’t used the search function, but this one is a top-notch request that I wanted to post about now.
Kinder Bueno
Kinder Bueno treats are quite high up in the popularity scale on my blog, with my Kinder Bueno cheesecake being ridiculously popular on here, as well as being my most watched youtube video!
Anyway, I always to this day still underestimate how popular anything Kinder Bueno themed is, so I knew this beauty had to come out at some point! Before Christmas is obviously ideal. Perfect show stopper
They make a cake look insane and make everyone go ‘oooooh’ and ‘ahhhh’ when they see it. That’s what you want when you bake a cake like this!


My Kinder Bueno cupcakes are a thing to behold themselves, and mainly where the inspiration for this recipe comes from. That, and being married to my Oreo drip cake to get an idea of ingredients amounts! This cake is essentially the beast of all things Kinder Bueno, and you’ll all be as obsessed with it as I am, very soon. I can promise you that!
Drip cake
For this one, after having posted my Terry’s chocolate orange layer cake recently, and my Nutella cake, I didn’t want to do this one as a ‘poop’ effect cake… but a drip cake. I do love a good layer cake, evidently, but a drip cake just take the cakes to the next level!
Yes, I would say that drip cakes are quite a bit of effort, but it’s 100% worth it. I know a lot of people don’t believe it, some probably do too much, but it took a lot of practice and time to get better at drip cakes for me. They were never so simple in my eyes, but once I had the right tools, it was an entire bunch easier. This isn’t a sales pitch, but its the truth.
Sponge
I went for a delicious and simple chocolate sponge for this beauty, as I just kinda love chocolate cake. Let’s be honest, how can you not. Also, in my Kinder Bueno cupcakes, I did the same. I did use a DELICIOUS sweet hazelnut & chocolate flavouring which is just incredible, and I can wholeheartedly recommend again for this one. If you don’t have access to it, however, you can swap it for vanilla extract!

Recommended tools!
The main question I get is ‘how do you get the sides so smooth’ and this large metal scraper is how. You need something taller than the cake, thin, and light. Having this angled spatula also helps.
Using a turntable makes things SO MUCH EASIER, and I recommend this turntable. When you plop your cake onto a ten-inch cake board, pipe the buttercream on it around the edges using this piping tip to coat the sides of the cake, it makes things easier. But using a turntable to turn the cake whilst you scrape the sides makes it MUCH easier.
Applying the ‘drip’
After you’ve got the hack of the buttercream down, it’s doing the drip bit. Having smooth sides isn’t essential, but its very much the sort after look when it comes to drip cakes.
You don’t need a piping tip, but you need a sealed piping bag. This does mean you can’t easily use the cloth reusable ones, but it’s worth it.


You fill the bag up with the chocolate, snip the smallest bit off.. probably something 4-5mm thick, and then you edge the chocolate over the edge of the cake. The longer you hold it there, or the harder you squeeze, it’ll drip further. If you barely touch the side, it’ll be a shorter drip!
More Kinder chocolate!
I then leave the cake to set a bit and decorate the top with swirls of leftover Kinder chocolate buttercream frosting. Top that, obviously, with pieces of Kinder Bueno to make it nice and obvious what flavour of cake it is, add on some chopped hazelnuts and some sprinkles to make it look a bit more ‘yay’ and you are basically there!
Piping bags and tips!
When I am decorating the sides of the cake for the drip, I recommend these piping bags for the drips. I use these piping bags for the buttercream and this piping tip for the buttercream swirls to make it nice and pretty!
So, as I write this post up, devouring yet another slice of another one of these cakes, I am happy that I am finally sharing this one for you! If you have any questions for me then leave a comment or email me! Enjoy!


Kinder Bueno Drip Cake!
Ingredients
Cake Ingredients
- 500 g unsalted butter
- 500 g light brown soft sugar
- 400 g self-raising flour
- 100 g cocoa powder
- 10 medium eggs
- 2 tsp vanilla extract *
Buttercream Ingredients
- 400 g unsalted butter
- 800 g icing sugar
- 300 g kinder chocolate
Decoration Ingredients
- 75 g dark chocolate
- 75 g milk chocolate
- 150 ml double cream
- Kinder Bueno
- Kinder Chocolate
- Sprinkles
Instructions
For the Cake
- Preheat your oven to 160ºc/140ºfan, and line two deep 8"/20cm cake tins with parchment paper.
- Beat together the unsalted butter and light brown soft sugar until light and fluffy.
- Add in the self-raising flour, cocoa powder, eggs, flavouring and beat again until combined.
- I usually beat the mixture for a couple of minutes until smooth.
- Split between the tins, and bake in the oven for 60-70 minutes. Test the cakes with a skewer to make sure it comes out clean.
- Leave the cakes to cool in the tins.
For the Buttercream
- Make sure your unsalted butter is at room temperature and beat on its own for a couple of minutes.
- Melt the Kinder chocolate in a bowl carefully either in the microwave or over a bain-marie, until melted. Leave to the side for a minute to cool.
- Add the icing sugar into the butter and beat in fully.
- Add in the melted kinder chocolate and beat again.
For the Decoration
- Split each cake into two, so you have four layers.
- Spread a smidge of buttercream onto your plate/cake board and put your first sponge on top. The smidge of buttercream keeps the cake secure.
- Spread some buttercream over the top, only about 1-2tbsp, and then add your next sponge.
- Repeat the process again and again, until you reach your fourth sponge.
- Add your final sponge, and then lightly cover the top and sides with a small amount of buttercream to create a crumb coat. Chill for 30 minutest.
- Slather on some buttercream onto the sides and top using a small angled spatula
- Using a large metal scraper, gently but firmly scrape around the edges of the cake in long glides.
- Chill again for another 30 minutes.
- Add the dark chocolate, milk chocolate and double cream to a jug, and microwave and stir until smooth.
- Using a small disposable piping bag, snip the end off and carefully drip down the sides of the cake.
- Leave the drips to set again for a small amount of time.
- Decorate how you fancy - I used leftover buttercream for swirls, and then covered the cake in all things, Kinder!
Notes
- For this recipe I recommend...
- This cake is very tall... for a smaller version, simply halve the recipe.
- It'll make a delicious two-layer cake.
- This cake will last for 3 days+ at room temperature.
- You can use milk/dark chocolate in the buttercream instead, but I definitely recommend the Kinder Chocolate to fit with the theme.
- Recipe update June 2022 - only difference is using a different drip method (150g dark chocolate + 1-2tsps oil before), and changing the flavouring to vanilla from This sweet hazelnut & chocolate flavouring!
ENJOY!
Find my other Recipes on my Recipes Page!
You can find me on:
Instagram
Facebook
Pinterest
Twitter
Youtube
J x
© Jane’s Patisserie. All images & content are copyright protected. Do not use my images without prior permission. If you want to republish this recipe, please re-write the recipe in your own words and credit me, or link back to this post for the recipe.
Hi Jane. I only have 7 inch tins. Can I stay with the same amount of ingredients or shall I use less? Thankyou. Xx
Hello! You could get away with the same but bake for a little longer xx
Hey! Is there anyway of turning this into a 2 tier cake? It’s for my dad’s birthday and he’s diabetic so just thinking of making it a little smaller. I’m sure he’d be more than happy to eat a 3 tier cake, but I thought I’d ask just incase!
Very excited to make another one of your recipes, they’re always INCREDIBLE!
Thank you!
As its a four layer cake, you can just halve it to make a two layer! x
Hi. What cocoa powder do u use for your chocolate cakes and what dark chocolate? What percentage? Also what milk and white chocolate brand do u use?
Hii! I use Barry cacao cocoa powder, 70% dark chocolate at least, but all chocolate is callebaut brand x
How would I make this a 3 layer non chocolate spring cake please ?
I’m not sure what you mean by spring cake, but to make it plain you would remove the cocoa powder and flavouring and just use more self raising to replace the cocoa powder!
Amazing cake Jane! What cocoa powder do you use?
Barry cacao 100%! x
Hi, I’m wanting to make this as a two tier how much ingredients would I need to use please? Also how much of the hazelnut and chocolate drops.
Thank you 😊
You can half it! And I would also use half of that x
Hi Jane,
I always use your recipes, they always work perfectly every time!
I’m baking a kinder bueno cake on Sunday very similar to this – I’m wondering if the buenos will last until Monday? I know it says 3+ days, but I made some kinder bueno cupcakes 2 days ago and the buenos have already gone stale!
Thank you!
They are still edible, but anything with a wafer will go stale. x
How much baking powder and coco powder would I use for a 3 layer version please?
I would use 400g butter and 400g sugar, 7-8 medium eggs, 340 flour, 60g cocoa powder, and 1tsp baking powder!
I am making this cake for a birthday party and I’m very confused on why should we only use dark chocolate and not any other type?
Because the chocolate ratios change and swap with every type of chocolate, so for best results you use dark!
Hi Jane..
Just wanted to say thanks for the recipe.. it was amazing and everyone was SOOOO impressed.
I wish i could upload a picture to show you.
You are amazing! Please keep up the good work and thanks for sharing with us!!
Looks so amazing! I’m making for a friends lockdown birthday!
Quick question! The recipe says 8 inch tins however I only have 7 inch tins! If I weighed out the mixture into 5, 7 inch tins would this work?
Honestly I am not sure, but I would assume so! I’m not sure on timings though x
Hi, I’m probably being silly but if I melt the kinder bars with the milk chocolate and white centre, how would the buttercream end up white as surely it will end up a milk chocolate colour? Am I missing something? Sorry!
I’m confused sorry.. my buttercream isn’t white?
Hi Jane I’m going to make this as a 6” version how much of each ingredients should I use thanks
I usually say 2/3 works for 6″! x
Hi really want to make this for my sons 16th and just wondered what I could use instead of the sweet hazelnut and chocolate flavour as cannot find any anywhere would buy them separately but just the same thanks for any help Emma
Just use vanilla extract or leave it out!
Hi Jane.
Adore your page and recipes. Huge thankyou.
Ive got the sweet hazlenut and chocolate flavouring. Your recipe states 2 tsps. Thats 10ml. Theres only 15ml in the bottle and it states that its very stong. Can you confirm the right amount is definitely 2 tsp?
This is a very large cake, so yes that is how much I use – but you can always use less if you prefer.